Author: Diana

  • Startup Branding Strategy: Make Visuals Cohesive

    Startup Branding Strategy: Make Visuals Cohesive

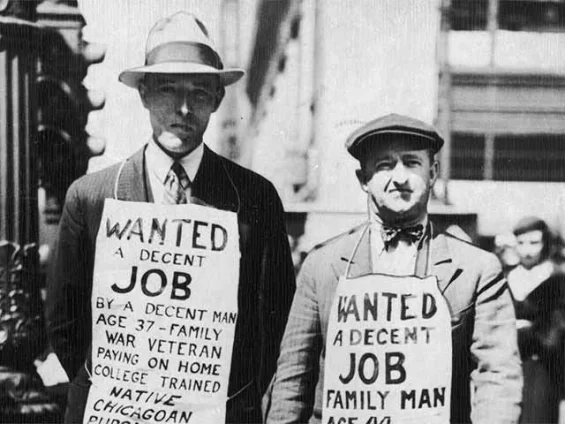
    Clean People had spent a decade building loyal customers who loved the convenience, but their startup branding strategy was actively working against them.

    Within our first conversation, I diagnosed this urgent problem for a tech-driven laundry delivery service.

    Ten years into running his laundry wash & delivery service, Nigel wanted help upgrading Clean People’s technology infrastructure to handle rapid growth.

    “Clean People” sounded like a corporate laundry service targeting businesses, not the delightful B2C experience Nigel had built.

    The logo was nonexistent. The sterile colors completely contradicted Nigel’s authentic mission: he genuinely finds laundry fun and wanted to share that joy.

    “The easiest way to do laundry is to let us do it for you,” ended up being their new tagline—but their brand at that point looked nothing like the delightful consumer experience they’d created.

    This is the art direction problem that haunts most successful startups: the gap between what you’ve built and how it feels to experience it.

    How to Come Up With Your Startup Branding Strategy

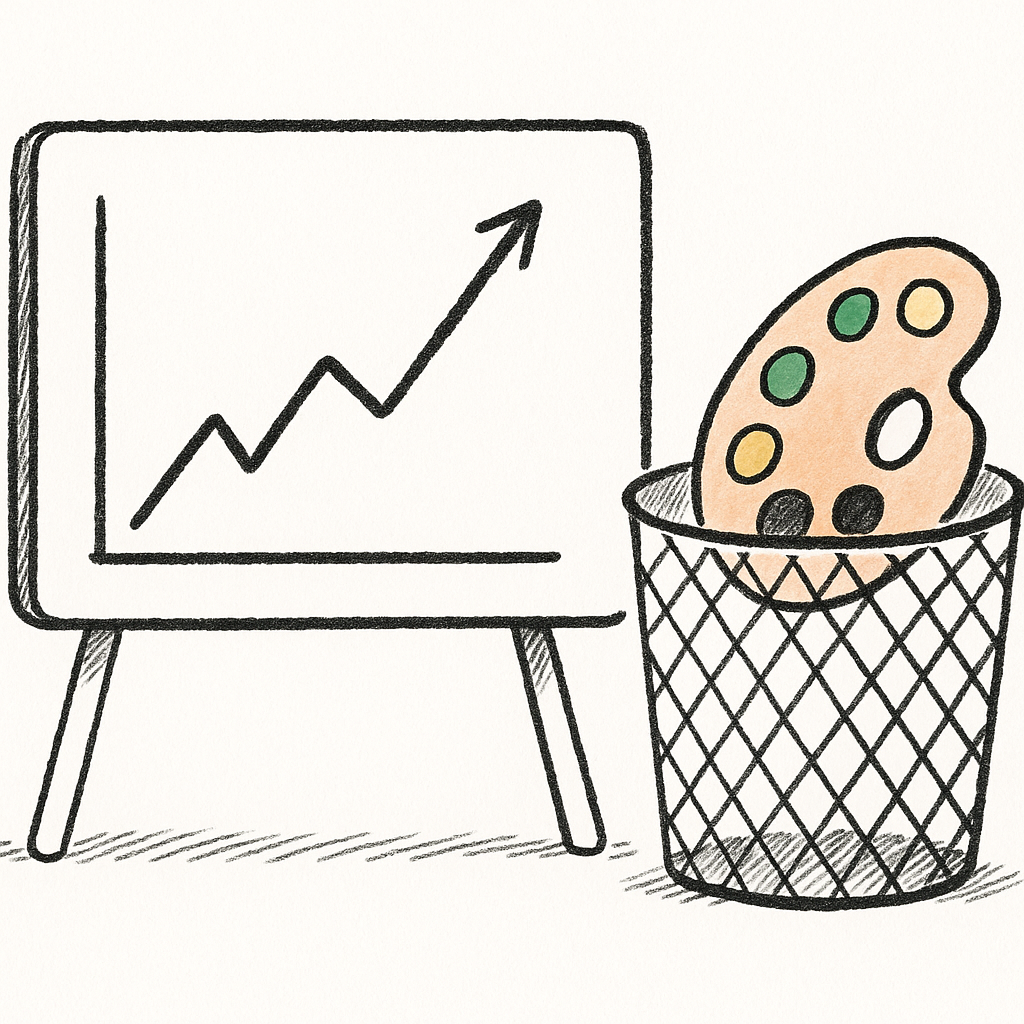
    Startups have an art direction problem.

    Most founders know when their design isn’t living up to its potential. They’ll search for solutions like 🔍

    • “Startup branding”
    • “Brand identity for startups”
    • “Cohesive visual identity”
    • “Consistent design”
    • “Polished startup design”
    • “Professional branding agency for early-stage companies”
    • “Startup visual style”
    • “Startup brand guidelines”
    • “Cohesive branding”
    • “Design systems for startups”
    • “Startup aesthetics”
    • “Visual consistency for startups”
    • “Startup brand look and feel”

    These are all ways of fumbling toward the same goal: a cohesive visual and emotional system that makes your startup look legit, trustworthy, and instantly recognizable. That’s art direction.

    I’ve worked with founders and nonprofits who came to me with this exact challenge. The good news? You don’t need a startup branding agency to solve it. You can build your own art direction playbook if you approach it step by step — and keep it honest to your mission.

    Because here’s the truth: people can smell fakeness. A slick aesthetic that doesn’t line up with your purpose will push people away. But an honest aesthetic multiplies your message.

    I’ve worked with dozens of founders stuck in this exact spot—from Popwash (formerly Clean People) to Mermory, a social flashcard app for students, to Katacoda, an interactive learning platform that O’Reilly Media eventually acquired.

    The pattern is always the same: great product, confused startup brand strategy.

    Here’s what I’ve learned about closing that gap.

    The Moment Everything Clicks For Your Startup Brand Identity

    Before diving into process, let me tell you about the moment founders know they’ve nailed their art direction.

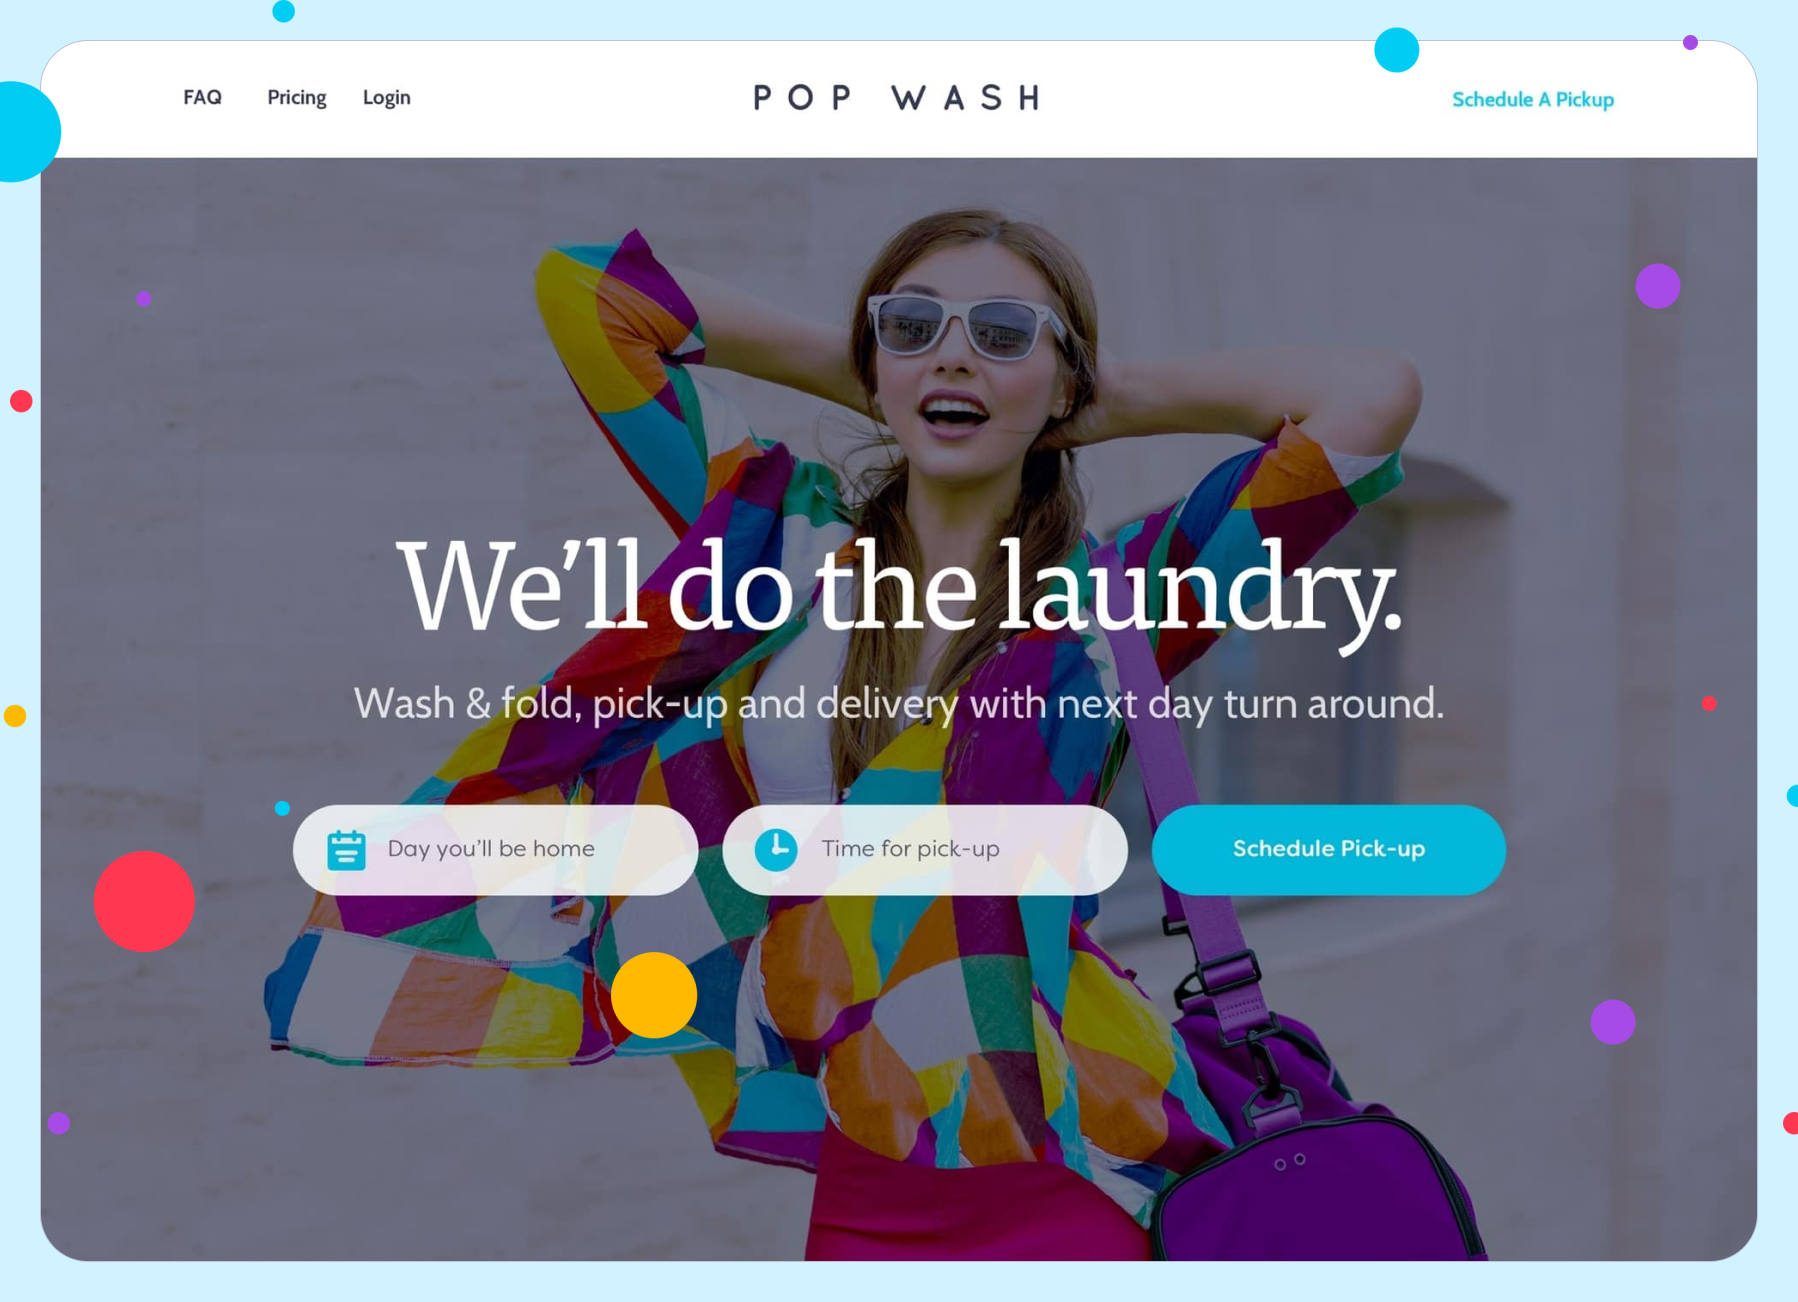
    It happened with Popwash when we replaced their sterile hospital aesthetic with warm, approachable colors and friendly typography. Nigel pulled up the new homepage and just stared. “This is what I’ve been trying to build all along,” he said. “Now people can see it too.”

    That’s the feeling you’re chasing: when your visual identity finally matches your mission so perfectly that explaining your startup becomes effortless. When customers look at your brand and immediately get what you’re about.

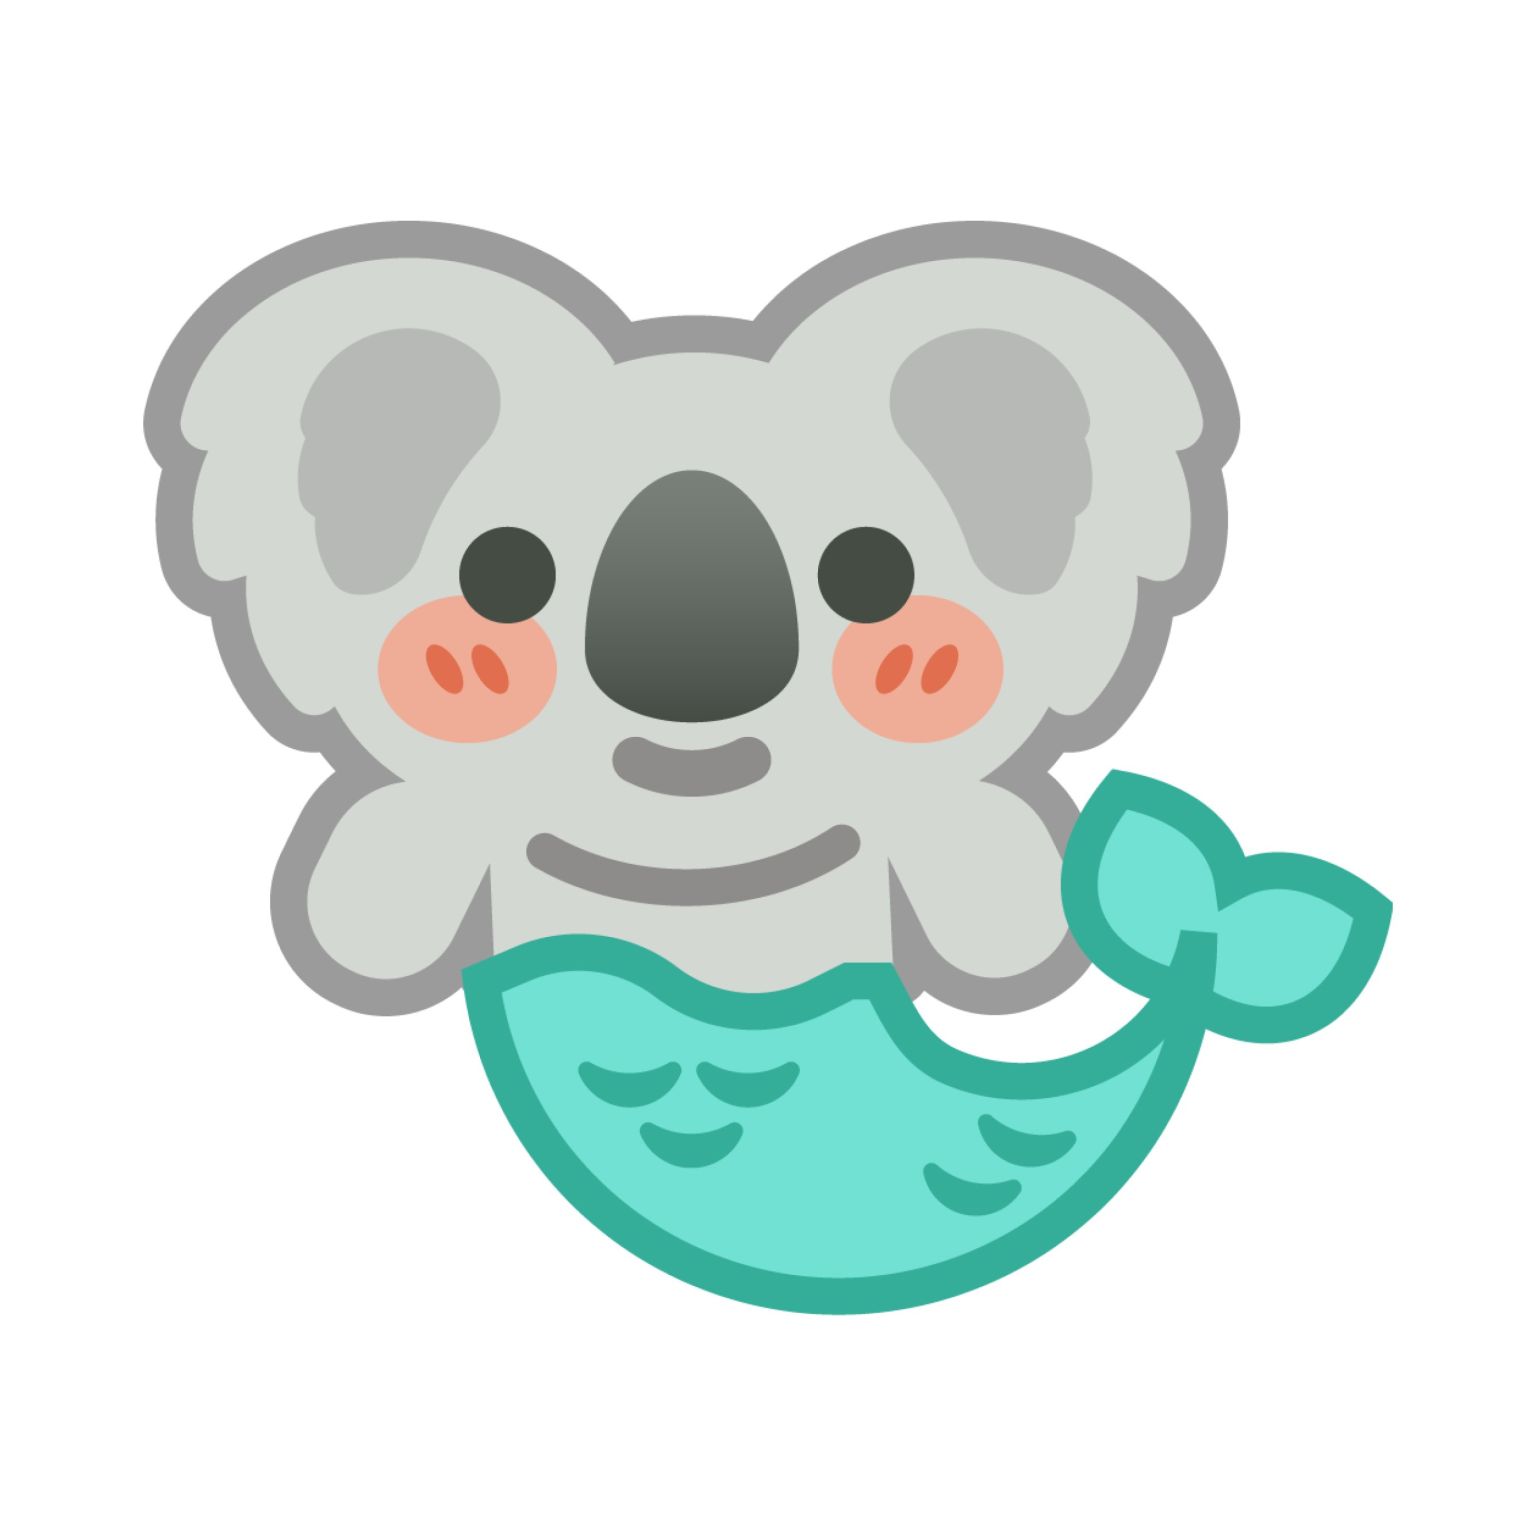
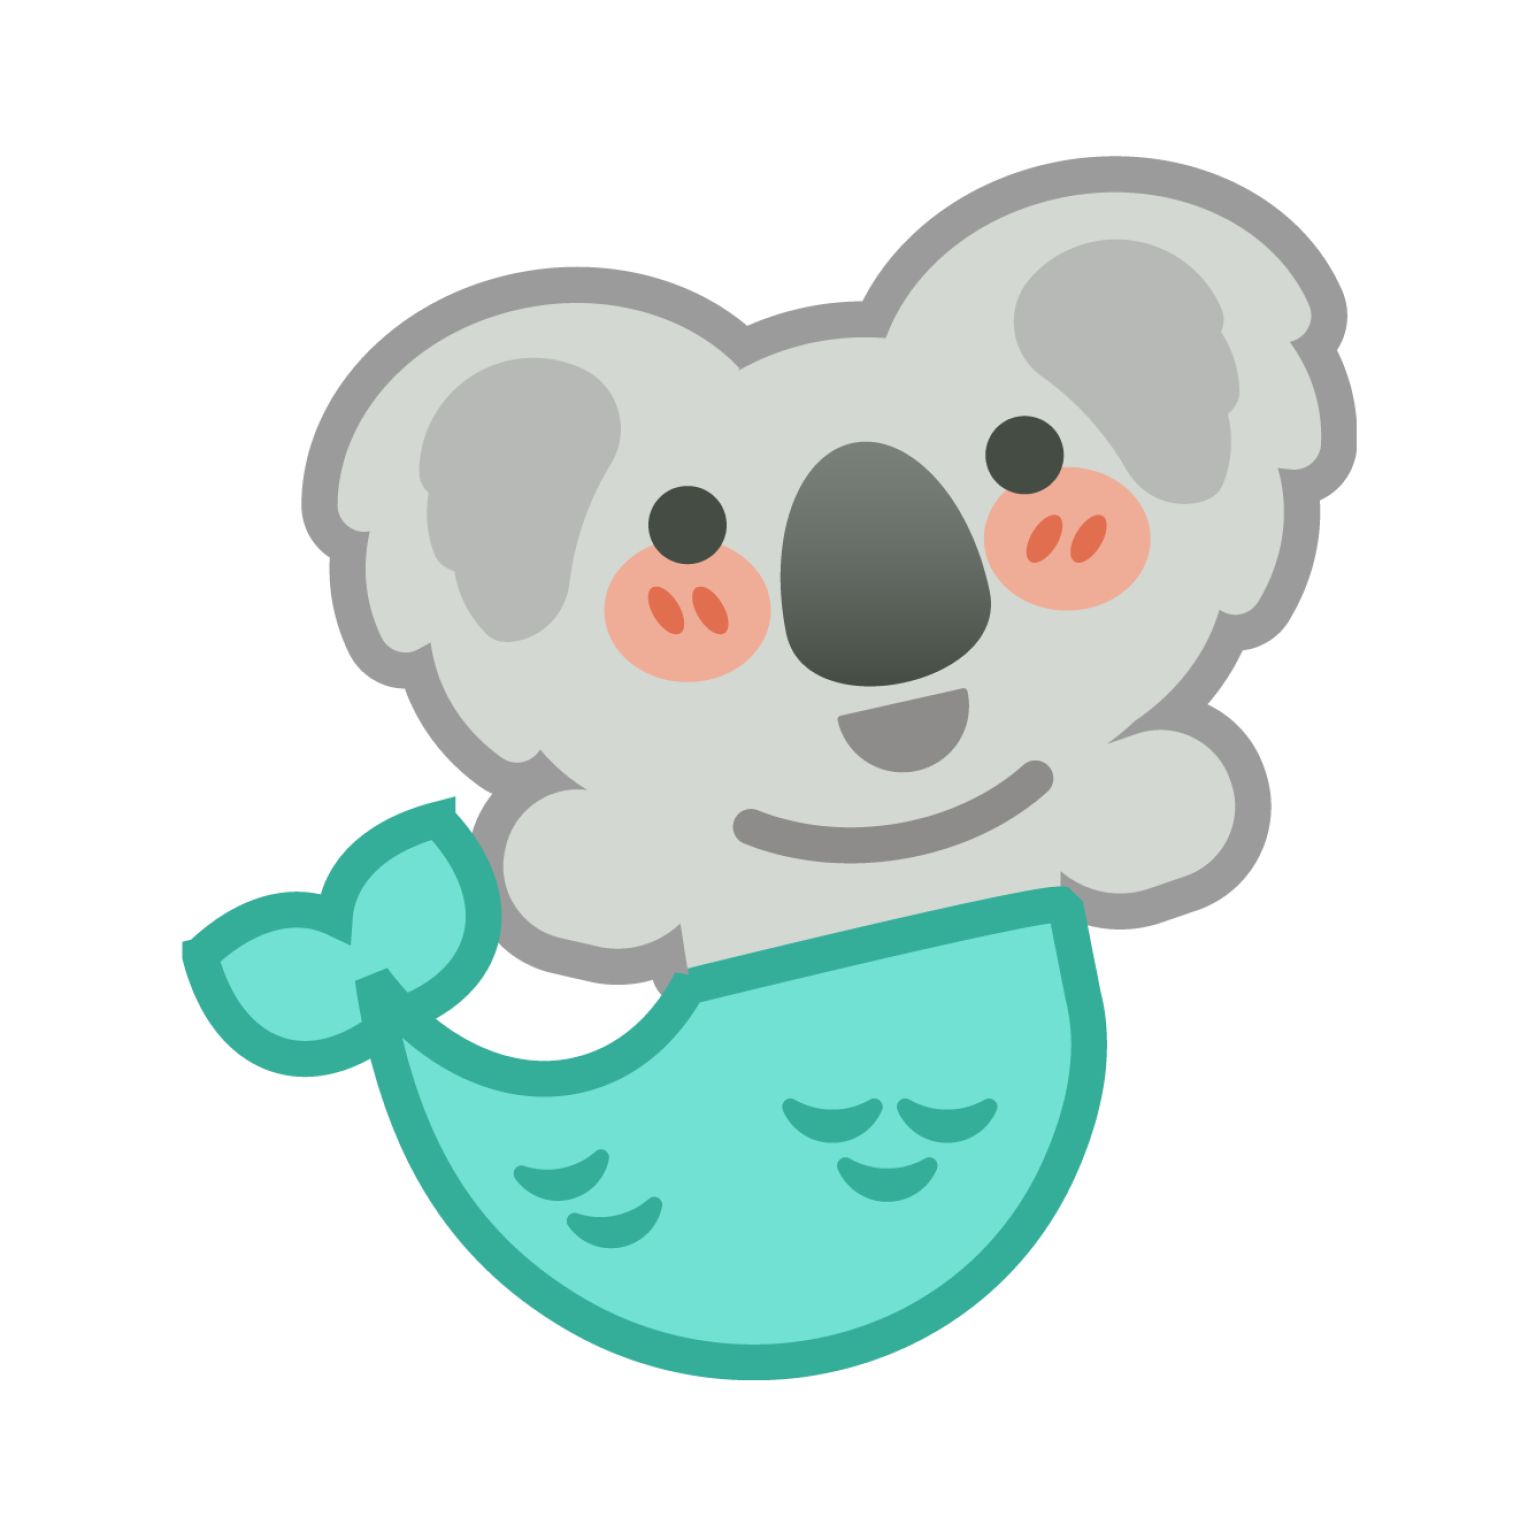
    For Mermory, it was when I drew their mascot—a friendly character that embodied the social, collaborative spirit of studying together. Suddenly their app wasn’t just another flashcard tool. It was a study buddy.

    How to Define Your Startup’s Visual Brand Identity Without Hiring an Agency

    The first step in building cohesive startup visual identity isn’t choosing colors or fonts. It’s getting crystal clear on what your product actually feels like to use.

    Start With Adjectives, Not Aesthetics

    When Clean People came to me, they knew their decade-old startup branding strategy felt dishonest for their B2C consumer experience, but they couldn’t articulate why. We started with a simple exercise: describe your product in three adjectives.

    Brand Adjectives for Startups (Pick 2 or 3)

    AccessibleAdventurousAuthoritativeAdaptable
    ApproachableAspirationalCalmCasual
    CharmingCreativeClassicComprehensive
    CollaborativeCutting EdgeDaringDirect
    DistinctiveDown To EarthEnergeticEloquent
    EstablishedFearlessFormalHeart-felt
    High-endHonestInclusiveInformal
    ImaginativeInspirationalInnovativeInviting
    KnowledgeableLogicalLuxuriousLoving
    MeaningfulMindfulMotivatedModern
    OriginalPassionateProfessionalPractical
    ReflectiveResourcefulRomanticSincere
    SociableStrategicSustainableThoughtful
    TraditionalTimelessTrustworthyUnique
    VisionaryWarmWittyZany

    Popwash’s first attempt: “professional, reliable, efficient.”

    That’s when I knew we’d found the problem. Those adjectives described a corporate laundry service targeting businesses, not Nigel’s authentic B2C mission.

    Here was someone who genuinely loves the satisfying feeling of fresh, perfectly folded clothes and wanted to give that gift to busy consumers. We workshopped new adjectives: “joyful, effortless, reliable.”

    The honesty breakthrough changed everything. Joyful meant warm, saturated, inviting colors that reflected Nigel genuine enthusiasm. It meant circles and rounded corners as a visual language. Effortless meant approachable typography and friendly consumer-focused messaging. The startup branding strategy from Clean People to Popwash captured this perfectly—it sounded playful and energetic, just like Nigel’s approach to laundry.

    Use Metaphors as Your North Star

    Sometimes the fastest way to align visuals with mission is through a powerful metaphor.

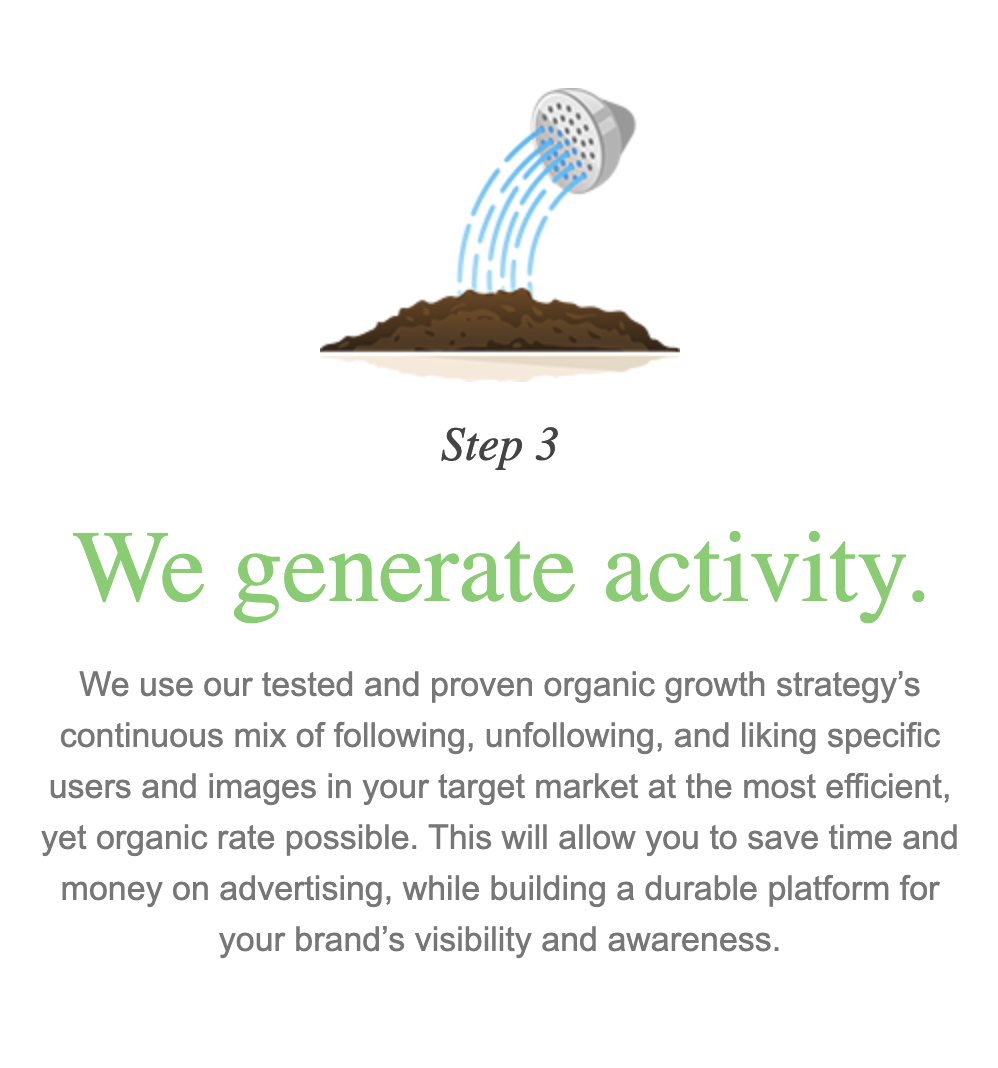
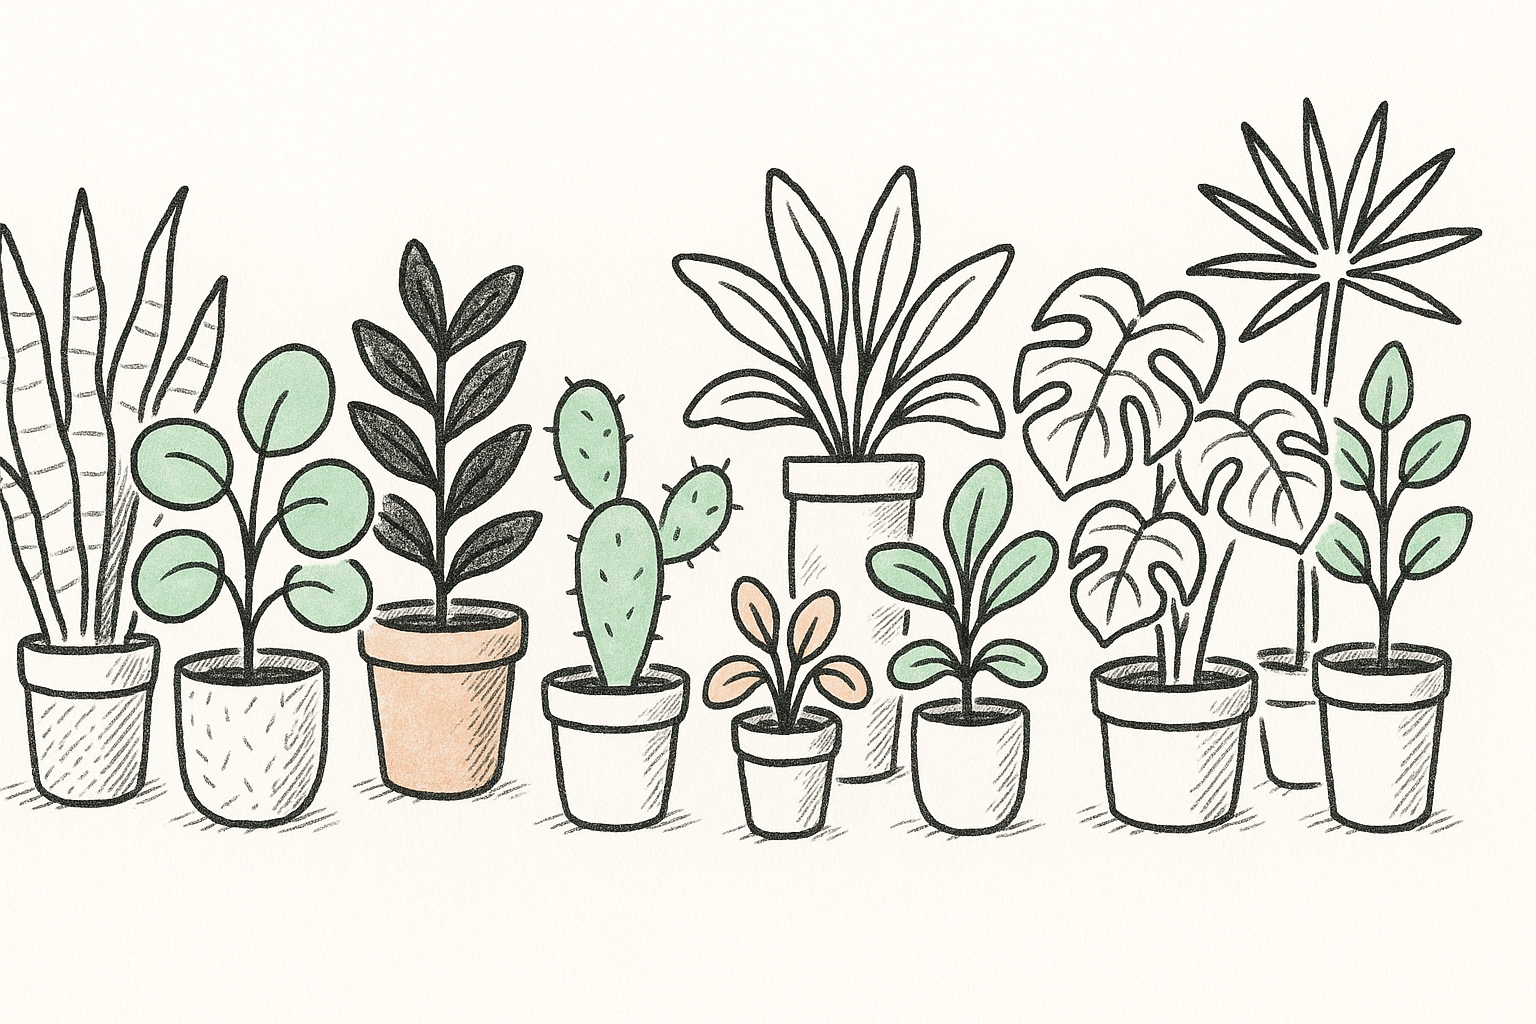
    Sogro, a business growth platform, had photos of random penguins on their About page. Cute, but meaningless. I replaced them with a simple visual story: seed → sprout → mature plant. It perfectly captured their name and mission. Their landing page conversion rate jumped from 4% to 10% literally overnight.

    Metaphors work because they give people an instant framework for understanding what you do — indispensable for your startup branding strategy.

    Step-by-Step Startup Brand Guide

    Once you’ve nailed your adjectives and metaphors, you can build a visual system that reinforces them consistently across all customer touchpoints.

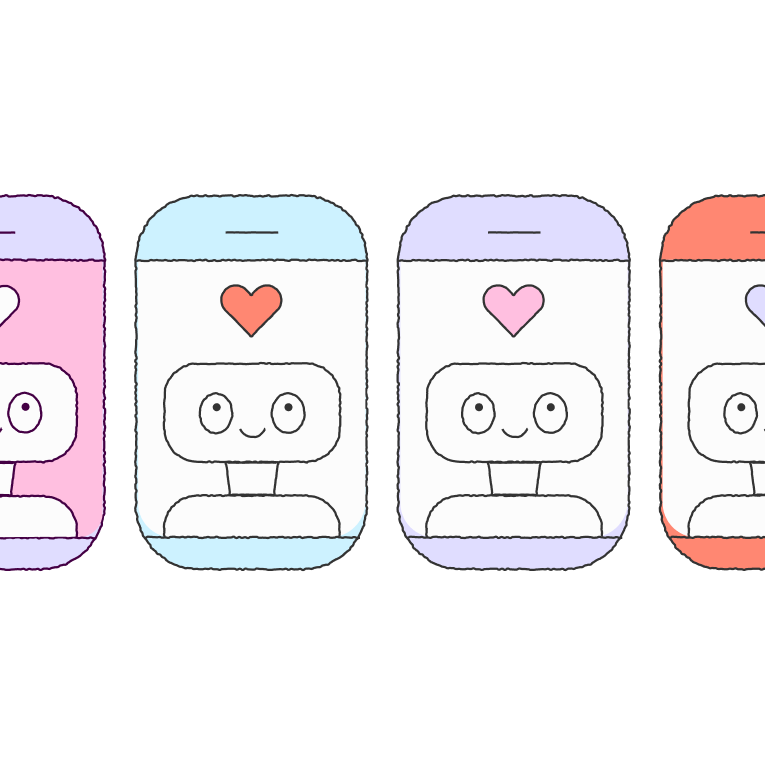
    Colors That Match Your Mission (And Actually Work)

    Use color psychology strategically:

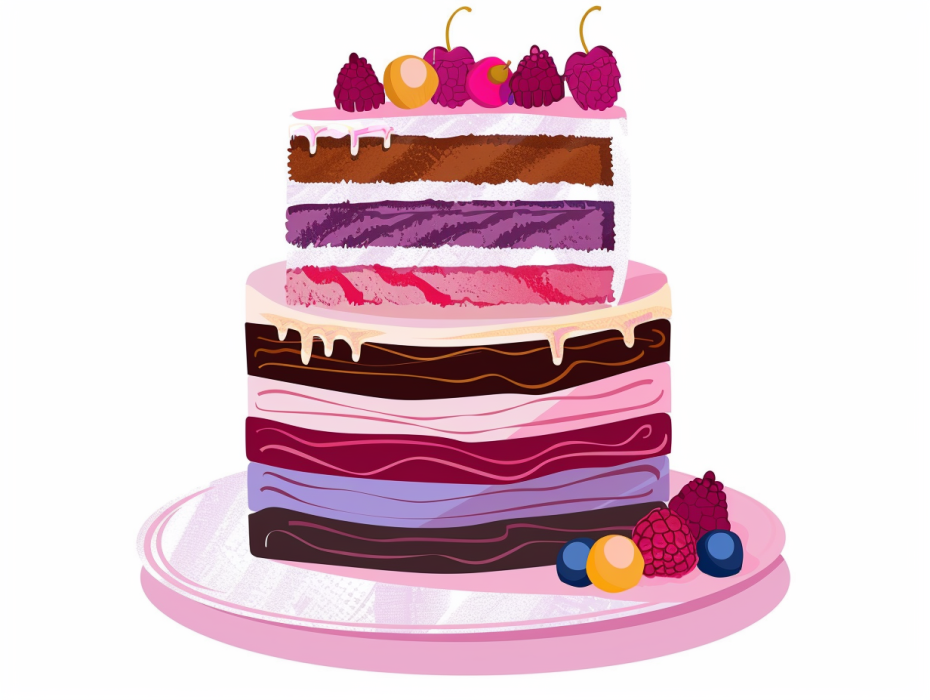
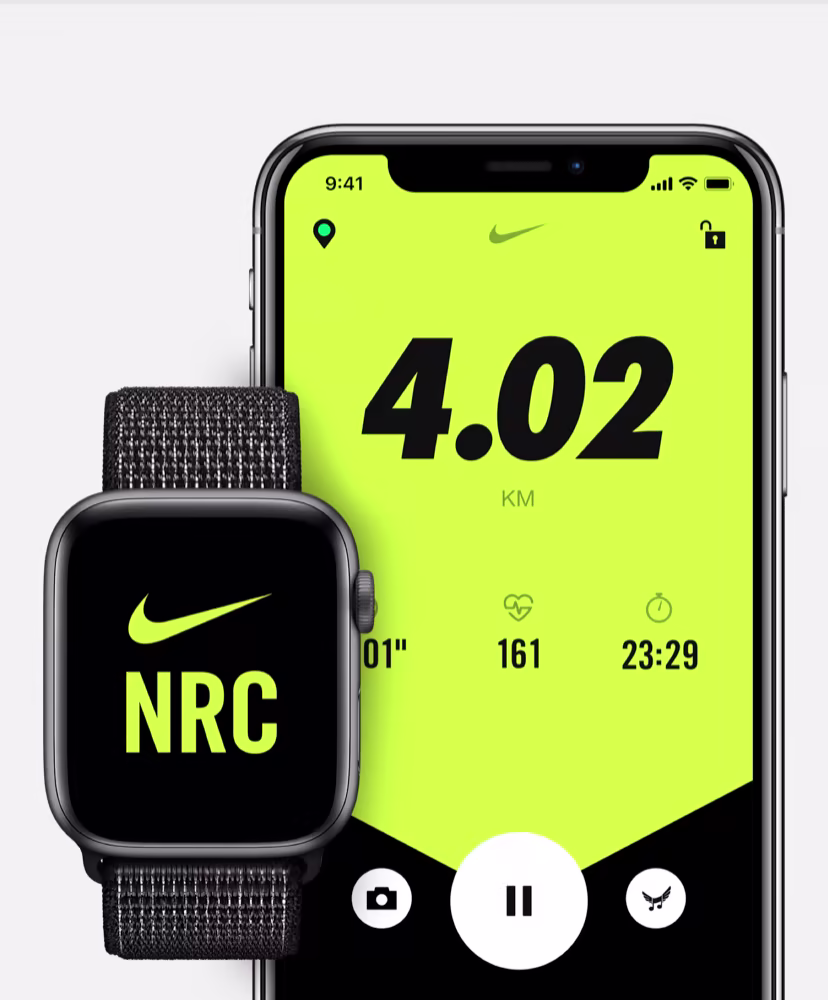
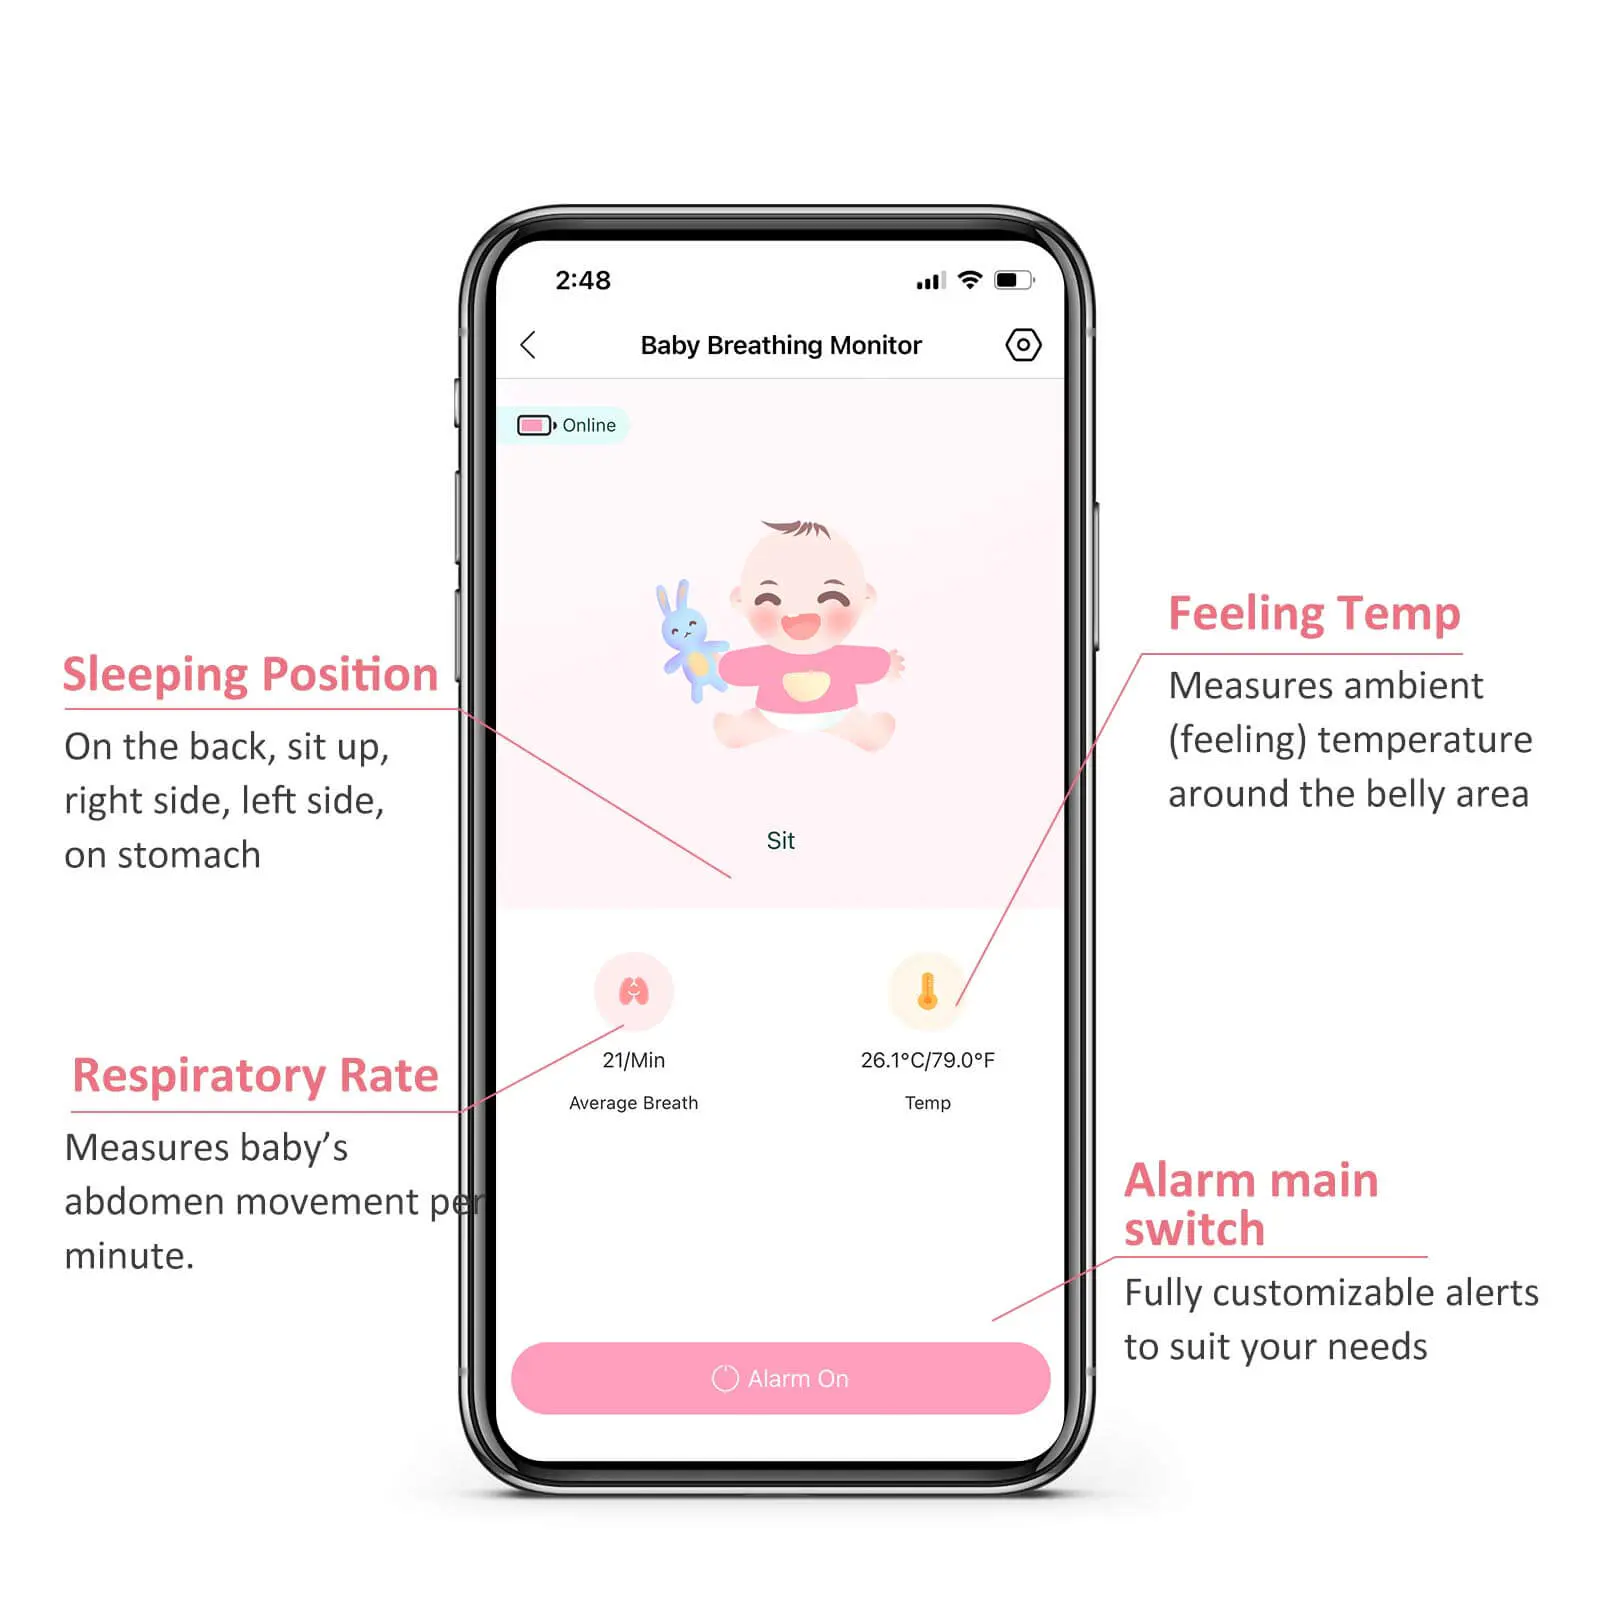
    • Hot colors or bright colors (reds, oranges, corals, neons) energize → perfect for fitness, productivity, action-oriented startups
    • Cool colors or pastel colors (blues, greens, bubblegum pink) calm and build trust → ideal for finance, healthcare, family-focused products

    Take a look at the difference it can make.

    But here’s a crucial part: use a tool like a11ycolors.com to narrow down your color scheme from the start. If you want purple for that royal, premium feel, don’t just pick any purple—use the accessibility checker to find purple combinations that meet WCAG contrast standards right out of the gate.

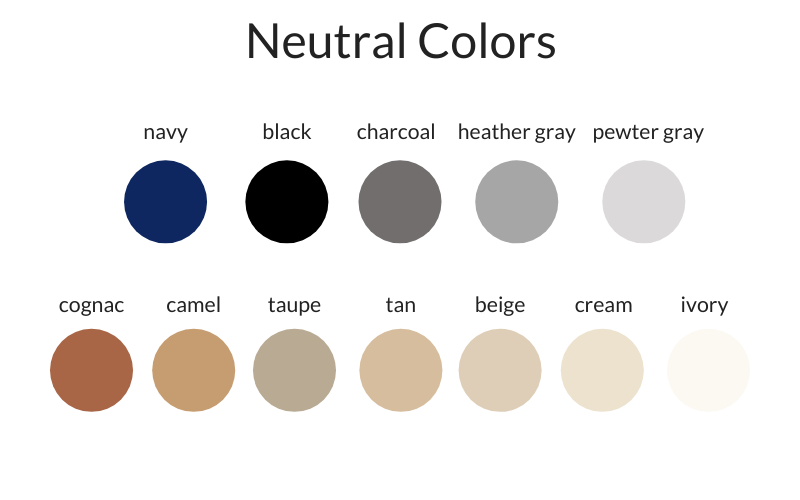
    Don’t forget neutrals. A warm beige feels soft and human, a pure gray feels sterile, a slate blue feels modern. The neutral you choose changes the whole emotional temperature of your startup brand strategy.

    Why Color Contrast Matters Beyond “Accessibility”

    Yes, good contrast helps people with visual disabilities—and that should be reason enough. But contrast also serves everyone else:

    • People using phones outside with screen glare can still read your content
    • Tired users scrolling at night don’t have to strain their eyes
    • Anyone scanning quickly can process information without their eyes glazing over

    When people have to work to read your content, they simply don’t.

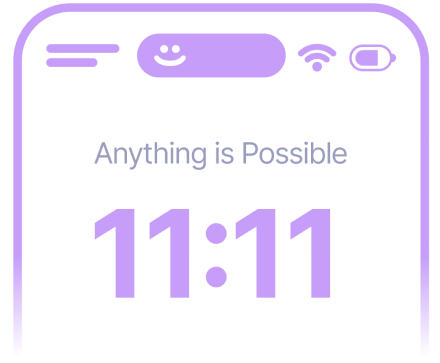
    Typography That Prioritizes Instant Legibility

    • Serif fonts = authority, tradition, editorial (think financial services)
    • Sans-serif fonts = modern, clean, tech-forward
    • Rounded sans-serif = friendly, approachable, human

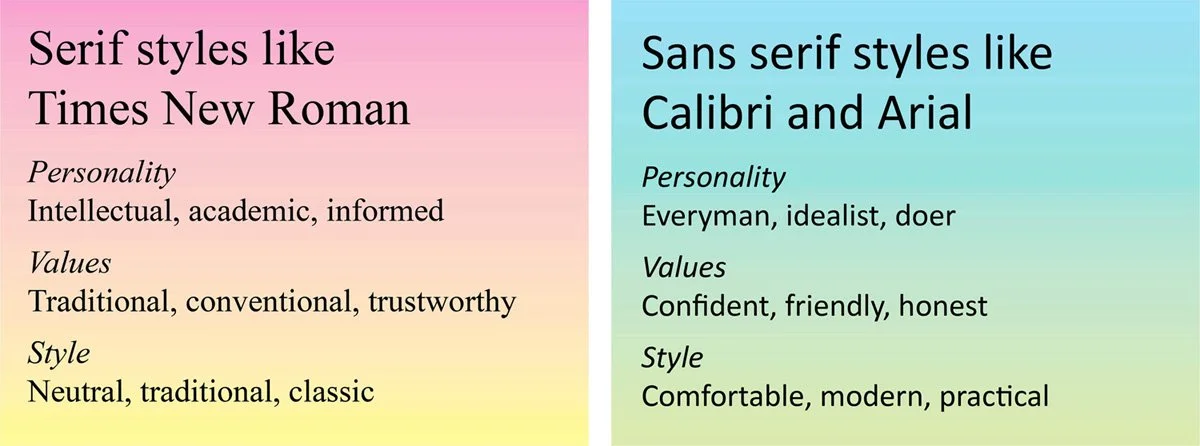
    But here’s the non-negotiable rule: instant legibility trumps everything. Don’t sacrifice readability for aesthetics, even if you find the “perfect” font with a quirky G or unusual character spacing. If users have to pause for even a millisecond to decode a letter, you’ve lost them.

    Your font should be invisible—users should absorb your message without noticing the typography at all. Even free Google Font combinations can carry a startup beautifully when chosen with clear intention and tested for immediate readability.

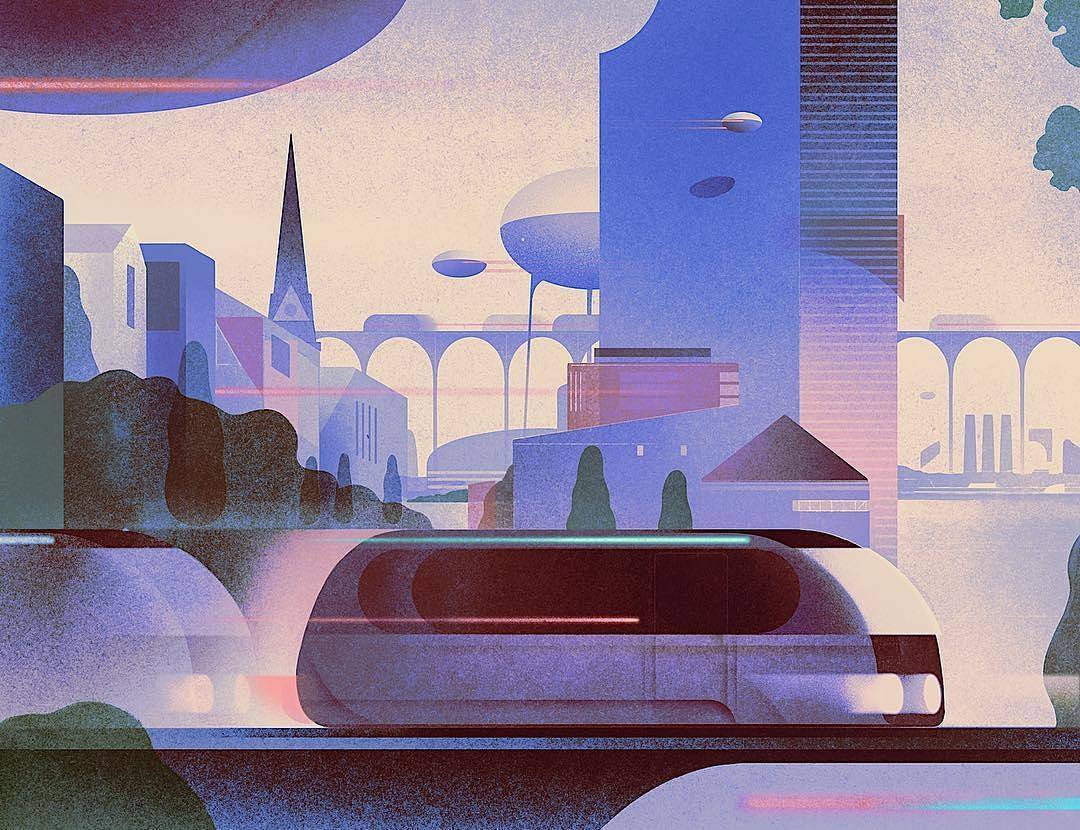
    Build Imagery That Feels Alive

    Now comes the fun part: generating imagery that feels like your brand.

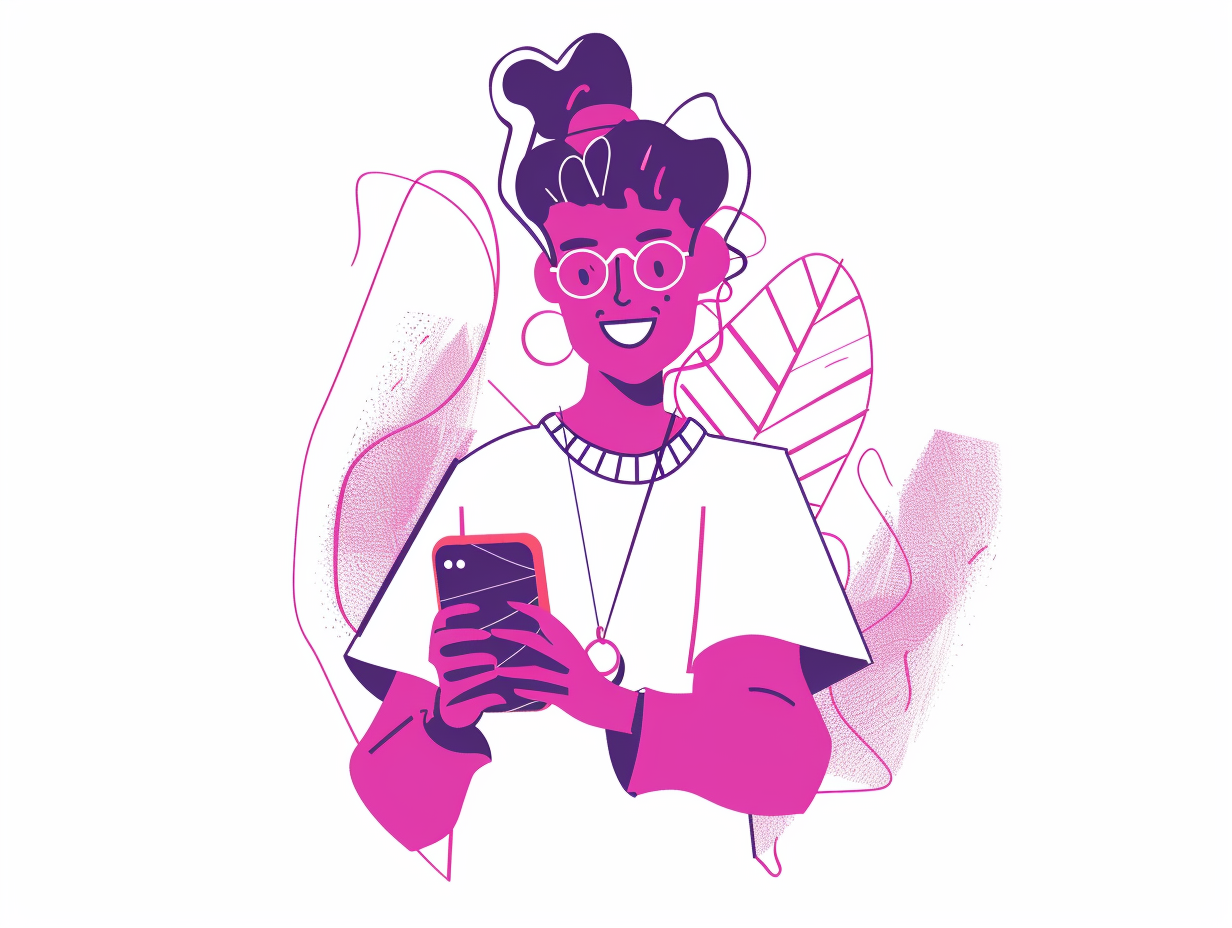
    Find Artistic References

    Take your adjectives and ask AI: “Given these adjectives [playful, curious, bold] and industry [education], which visual artists’ work aligns with this vibe?” This gives you a lineage of style to draw from instead of random moodboards.

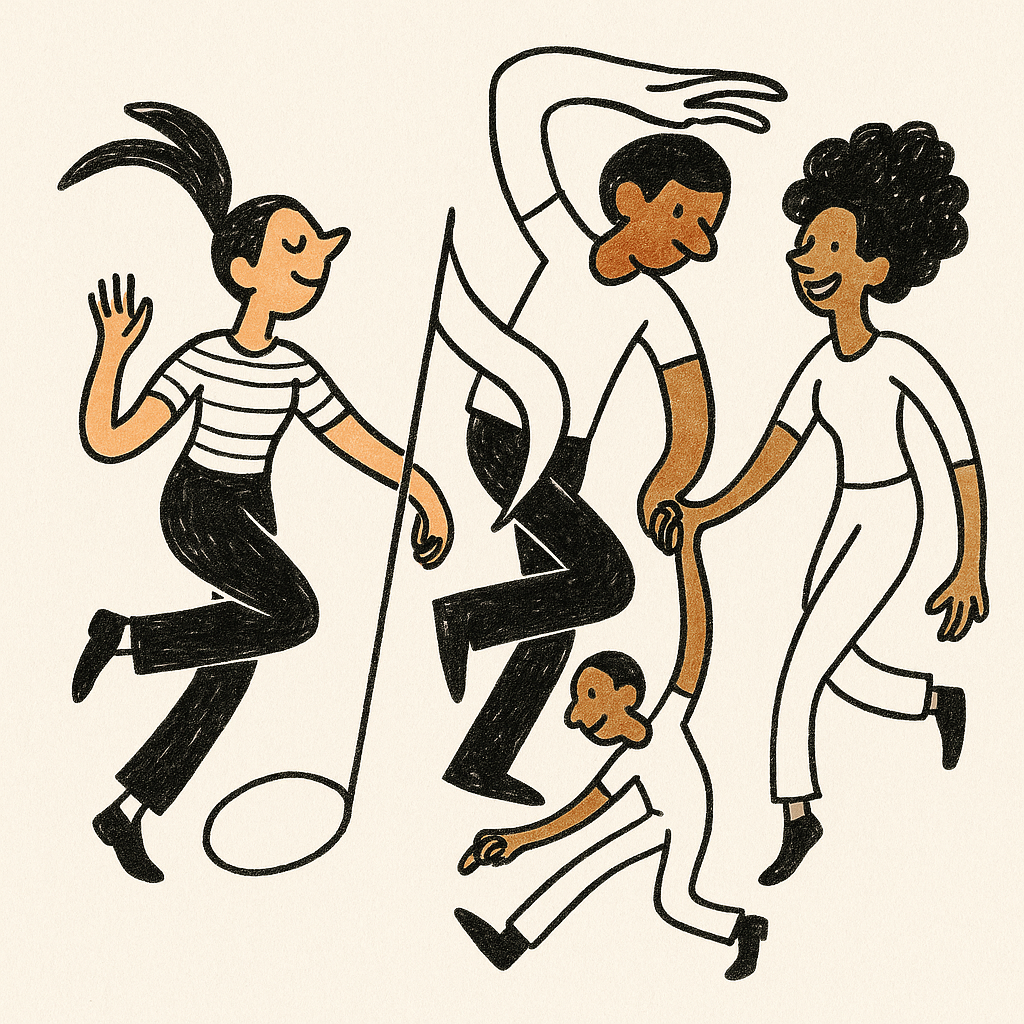
    Take a look at how this strategy created an illustration style based on the vibe of Shel Silverstein for a startup brand strategy.
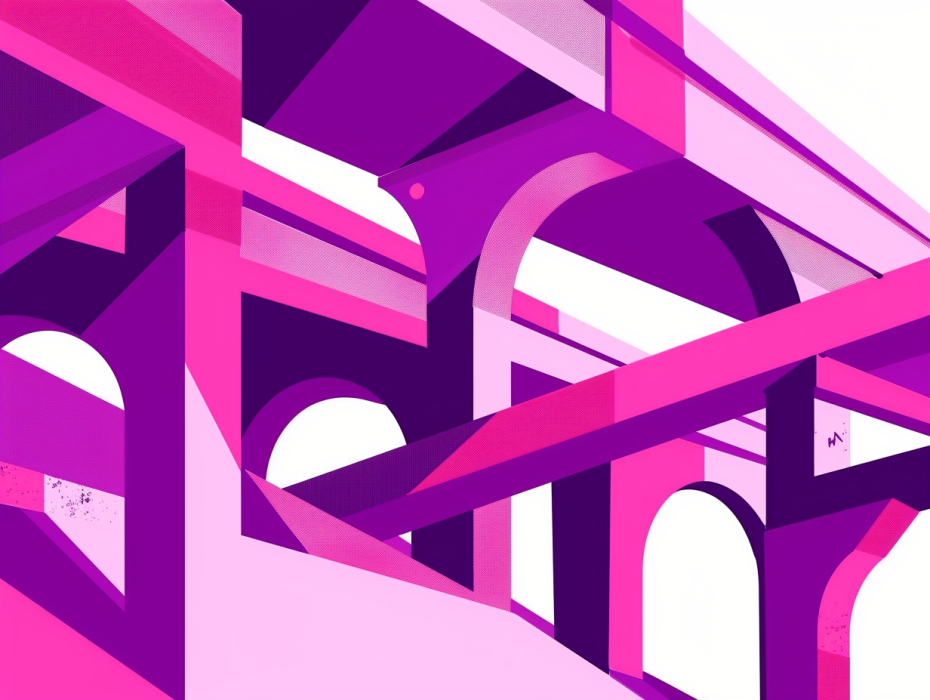
    Subject vs. Style

    When you find an artist reference you like, feed samples into AI and ask it to separate subject (what’s depicted) from style (how it’s depicted). For example:

    • Subject = “abstract figures in motion”
    • Style = “rough textured brushwork, vibrant colors”

    This helps you articulate what you want beyond “I just like it.”

    Brainstorm Before You Burn Credits

    Here’s a pro tip: you don’t need to generate 50 images to find your direction. You can have back-and-forth conversations with AI about metaphors, moods, and imagery ideas. Brainstorming in text first saves your image credits and gets your prompts sharp before you hit “generate.”

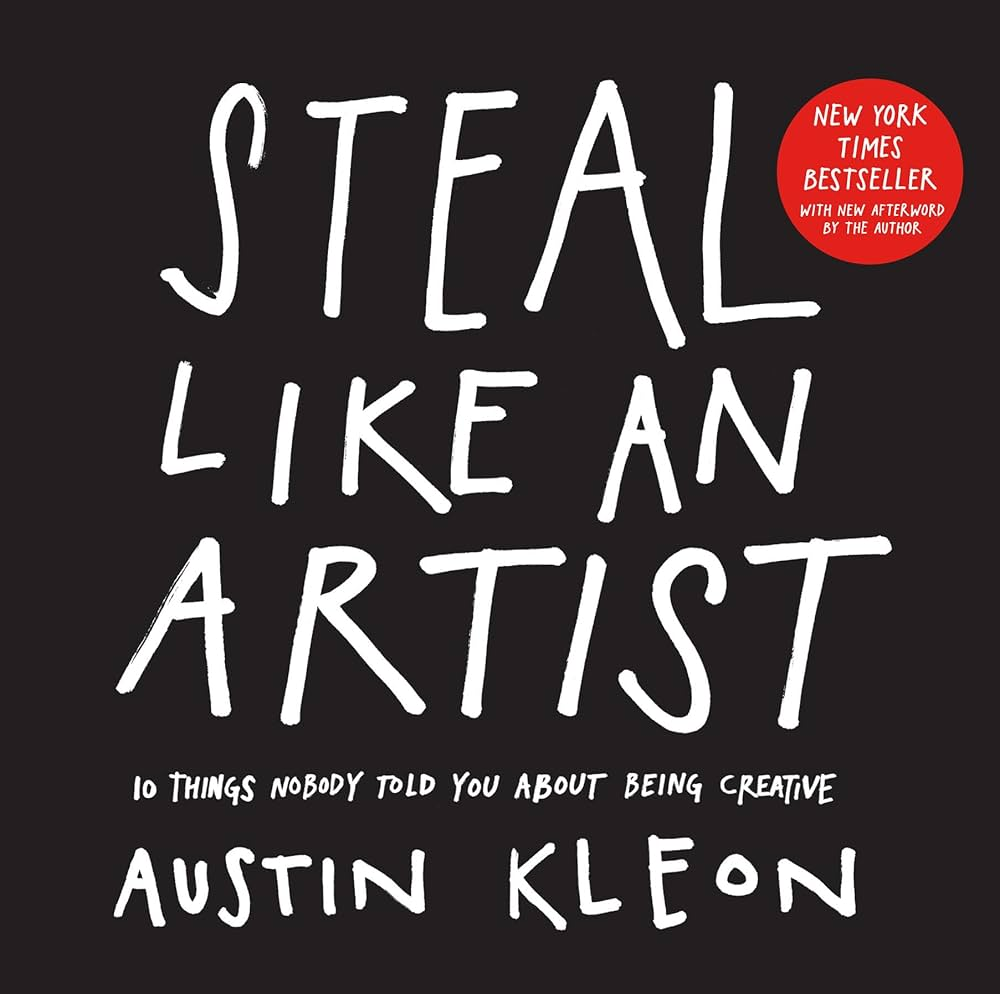
    Question: Is this stealing?
    Answer: Sure.

    Static imagery is what people scroll past. Engaging imagery has:

    • Characters with expressive body language rather than stiff poses
    • Implied motion—capture things mid-action, not frozen
    • Emotional tension—show the peak moment, not the setup

    When I designed Mermory’s mascot, I made sure it looked mid-conversation, like it was actively helping students study together. That single character communicated their entire value proposition: studying doesn’t have to be lonely.

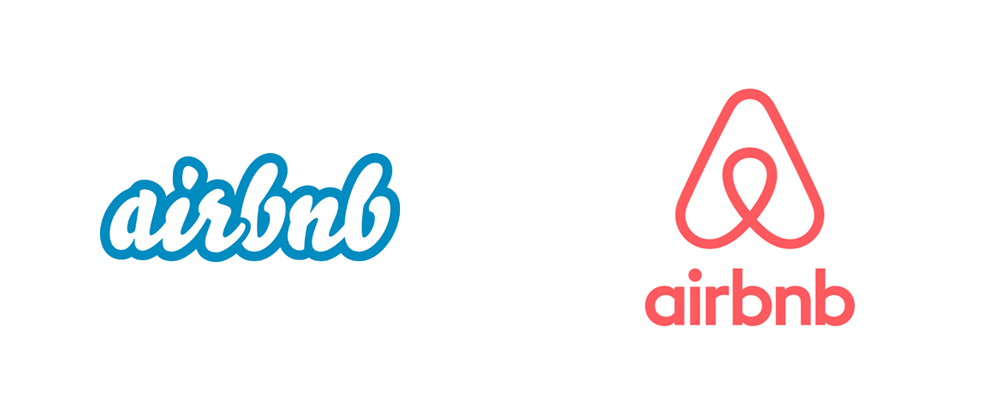
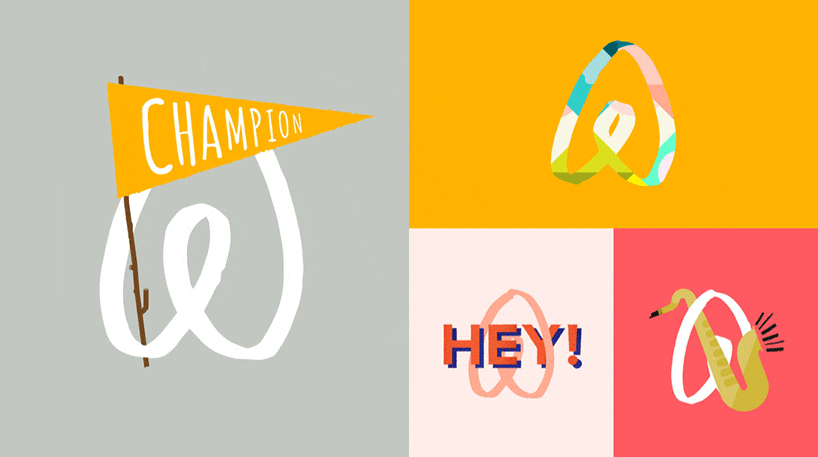
    Real-World Example: Airbnb

    When Airbnb refreshed its brand, it ditched generic stock photos for warm, hand-drawn illustrations. Suddenly the platform felt human, belonging-oriented, and global. That’s startup branding strategy at work: showing values in style, not just words.

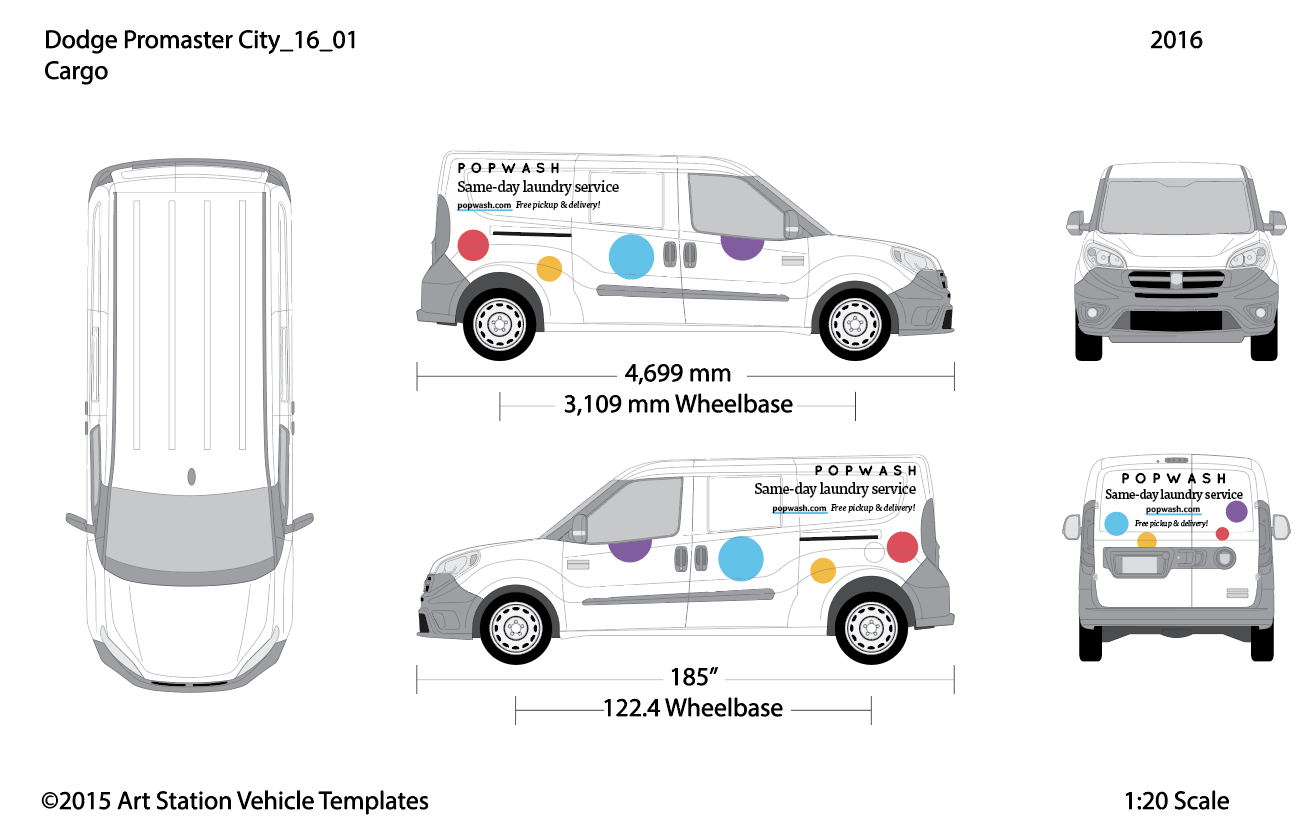
    This art direction will inform your entire visual identity. For example, look at how Popwash’s new brand informed their company’s van.

    How to Apply Your Visual System Across All Startup Touchpoints

    Professional Layouts That Support Your Brand Identity

    Use proven frameworks like Tailwind CSS and open-source UI kit libraries like HyperUI and Klutty to handle the technical structure. These give you professional, accessible layouts without the development overhead.

    Then inject your custom colors, fonts, and imagery into that proven skeleton. The layout stays professional and conversion-optimized; the personality becomes unmistakably yours.

    This startup branding strategy lets bootstrapped startups compete visually with companies that have full design teams—you get the professional foundation, but with your authentic brand personality layered on top.

    Voice That Matches Your Visuals

    Your adjectives should guide your language, not just your design. If your brand is approachable and effortless, your copy can’t sound corporate and stiff.

    Quick test: read your homepage copy out loud. Does it sound like someone your target customer would actually want to work with? Does it feel natural for you to speak in that voice?

    Phase 4: Test and Validate

    Show your visual system to people in your target audience and ask two questions:

    1. “What does this make you feel?”
    2. “What kind of company do you think this is?”

    If their answers align with your adjectives, you’re on track. If not, adjust.

    With Katacoda’s interactive learning platform (which O’Reilly Media eventually acquired), we knew we’d nailed the art direction when beta users started describing it as “the most approachable way to learn complex technical skills”—exactly the feeling we’d been designing toward.

    The Compound Effect of Honest Art Direction

    Here’s what happens when you get art direction right: everything becomes easier.

    Your website converts better because visitors immediately understand what you’re about. Customer conversations get smoother because your visual identity does half the explaining. Hiring even becomes easier because potential employees can see your company culture in your brand.

    Engineers at Gusto express love for this animation.

    Most importantly, you stop feeling embarrassed about your startup’s appearance. Instead, you feel proud to share it.

    Art direction isn’t decoration—it’s a force multiplier for everything you’ve already built. When your visual identity honestly reflects your mission, it stops being a barrier and becomes a bridge to the people you’re trying to reach.

    Ready to Bridge the Gap?

    If you’re stuck in that familiar place—knowing your startup deserves better visual representation but not sure how to get there—that’s exactly where I come in. At Pixelswithin, I help founders translate their vision into art direction that works as hard as they do.

    The difference between confusing branding and compelling art direction often comes down to one thing: someone who can see what you’ve built and help the world see it too.

    Ready to close the gap between your product and its visual identity? Let’s talk about your art direction journey →

  • How to Vibe Code a Website in 7 Days

    How to Vibe Code a Website in 7 Days

    Imagine vibe-coding a website you can show friends, drop in Discord, maybe even put on your resume. Not a billion-user platform (yet). Not a perfect website. Just the holy grail loop: someone posts, someone else sees it, someone else reacts, and boom — you’ve built something you can now optimize & monetize.

    That’s vibe coding. It’s about creating a small, useful product, testing it with real people, and learning faster than endless tutorial-watching ever allows.

    And yes — AI is your coding buddy here. You can use it to write code, explain errors, or even build features. But we’re not paying for fancy customer-facing AI services inside our app yet.

    Yes, this is an app — an app with a web platform.

    We’re using free tools until we know this thing actually works.

    Before you start…

    Grab a piece of paper (or open Notes) and write down three things:

    Promise – one sentence describing what your app does. We’re gonna go with “A place where people in my friend group can post random thoughts and vote on the funniest ones” in this article as an example.

    Constraints – what you absolutely will NOT do this week. Example: No photos, no links, no notifications, no user profiles, only one level of comments.

    Scope – exactly what you will build:

    • People can sign up with email/password
    • People can post text (like a tweet, but longer)
    • People can see all posts on one page
    • People can upvote posts
    • People can comment on posts (just one reply level)
    • People can delete their own posts

    It may seem like a mysterious process, but think of it as a website that takes data and displays it. Think in terms of CRUD.

    What is CRUD? CRUD stands for Create, Read, Update, Delete. Most websites are actually don’t veer from this simple methodology. It’s how most of the websites you use work.

    This document is your north star. When you get excited about adding features (and you will), check this list. Not on here? Save it for week two.

    Day 1: Plan Like a Pro — Endpoints, Database, Screens

    Don’t code yet. Seriously. Planning saves you from rewriting everything on day 5.

    What Are Endpoints?

    Think of endpoints like doors into your website. When someone clicks “Submit Post,” your app sends a message through a specific door that handles post creation. Here are your doors:

    GET yourwebsite.com/posts — “Hey app, show me all the posts”

    POST /posts — “Hey app, save this new post I wrote”

    POST /votes — “Hey app, I’m upvoting this post”

    POST /comments — “Hey app, save this comment on this post”

    DELETE /posts/:id — “Hey app, delete my post”

    (GET, POST, and DELETE are HTTP verbs — learn more at w3schools.)

    That :id thing? It’s like a locker number. So /posts/47 means “do something with post number 47.” When someone wants to delete their post, the app needs to know WHICH post to delete.

    What if user A tries to delete user B?

    Matter of fact, how can you assume good intentions from users while vibe coding?

    The sad answer is you can’t. That is why you must “sanitize” data, protect against XSS (cross-site scripting), and implement CSRF.

    These concepts are too much to go into in this article, but be sure to ask your AI for a security audit per file or flow. Make sure you’re covered.

    For each endpoint, write down:

    • Input: What information comes in? (post text, user who wrote it, timestamp)
    • Output: What comes back? (success message, the new post data, or an error)
    • Rules: Title must be under 280 characters, user must be logged in, etc.

    Database Planning (Your App’s Memory)

    A database is like a filing cabinet for your app. You need different drawers (called “tables”) for different types of information.

    I will tell you the exact database structure you need to get started, but in the spirit of teaching a man to fish, here are some database design rules of thumb — this is how you make sure the state of your data supports your growth rather than holds you back.

    Users table (who can use your app):

    • id: unique number for each user (1, 2, 3…)
    • email: their email address
    • password: scrambled version of their password (never store plain passwords!)
    • created_at: when they joined

    Posts table (all the posts people write):

    • id: unique number for each post
    • user_id: which user wrote this (connects to Users table)
    • text: the actual post content
    • created_at: when they posted it
    • upvotes: how many people liked it

    Comments table (replies to posts):

    • id: unique number for each comment
    • user_id: who wrote this comment
    • post_id: which post this is commenting on
    • text: the comment content
    • created_at: when they commented

    Screen Planning (What Users Actually See)

    Sketch these screens. Use rectangles, stick figures, whatever works:

    Home page: List of all posts, newest first, with upvote buttons

    Submit page: Text box + submit button

    Post detail page: One post + all its comments + comment form

    Login page: Email + password + login button

    Signup page: Email + password + confirm password + signup button

    Day 2: Set Up Your Coding Environment and Project Structure

    Time to get your hands dirty, but we’re starting organized.

    Install Your Tools

    You’ll need:

    1. Node.js (the engine that runs JavaScript on your computer) – download from nodejs.org
    2. VS Code (where you’ll write code) – download from code.visualstudio.com
    3. Git (saves versions of your code) – download from git-scm.com

    Create Your Project Folder

    Open terminal/command prompt and start by vibe coding these commands one by one:

    mkdir vibe-code-website
    cd vibe-code-website
    npm init -y
    npm install express sqlite3 bcrypt jsonwebtoken

    Translation:

    1. Make a folder called vibe-code-website.
    2. Go into it
    3. Create a package.json file (keeps record of your project dependencies)
    4. …And install the code libraries you’ll need:
    1. Express — this will manage your endpoints
    2. Sqlite3 is your minimal database
    3. Bcrypt will handle password encryption
    4. JSONwebtoken makes sure the user is who they say they are

    Organize Your Files

    Create this folder structure:

    vibe-code-website/
    ├── src/
    │   ├── database/
    │   │   └── db.js
    │   ├── routes/
    │   │   ├── auth.js
    │   │   ├── posts.js
    │   │   └── comments.js
    │   ├── public/
    │   │   ├── index.html
    │   │   ├── style.css
    │   │   └── script.js
    │   └── server.js
    └── package.json

    Why organize like this?

    • database/: All your database setup code
    • routes/: Each file handles different endpoint doors (auth = login/signup, posts = creating/reading posts, etc.)
    • public/: The HTML, CSS, and JavaScript that users see in their browser
    • server.js: The main file that starts your app

    Day 3: Build Your Database Foundation

    Set Up SQLite (Your App’s Filing Cabinet)

    Create src/database/db.js and ask AI to help you. Here’s how to use AI effectively:

    Prompt to AI: “Write me SQLite database setup code for a CRUD website, a social network. I need users, posts, and comments tables. Users need id, email, password_hash, and created_at. Posts need id, user_id, text, upvotes, and created_at. Comments need id, user_id, post_id, text, and created_at. Include code to create the tables if they don’t exist.”

    The AI will give you code that looks something like this:

    const sqlite3 = require('sqlite3').verbose();
    const path = require('path');
    
    // Create or connect to database file
    const db = new sqlite3.Database(path.join(__dirname, 'website.db'));
    
    // Create tables if they don't exist
    db.serialize(() => {
      // Users table
      db.run(`CREATE TABLE IF NOT EXISTS users (
        id INTEGER PRIMARY KEY AUTOINCREMENT,
        email TEXT UNIQUE NOT NULL,
        password_hash TEXT NOT NULL,
        created_at DATETIME DEFAULT CURRENT_TIMESTAMP
      )`);
      
      // Posts table
      db.run(`CREATE TABLE IF NOT EXISTS posts (
        id INTEGER PRIMARY KEY AUTOINCREMENT,
        user_id INTEGER NOT NULL,
        text TEXT NOT NULL,
        upvotes INTEGER DEFAULT 0,
        created_at DATETIME DEFAULT CURRENT_TIMESTAMP,
        FOREIGN KEY (user_id) REFERENCES users (id)
      )`);
      
      // Comments table
      db.run(`CREATE TABLE IF NOT EXISTS comments (
        id INTEGER PRIMARY KEY AUTOINCREMENT,
        user_id INTEGER NOT NULL,
        post_id INTEGER NOT NULL,
        text TEXT NOT NULL,
        created_at DATETIME DEFAULT CURRENT_TIMESTAMP,
        FOREIGN KEY (user_id) REFERENCES users (id),
        FOREIGN KEY (post_id) REFERENCES posts (id)
      )`);
    });
    
    module.exports = db;
    

    What this code does: It creates a database file called website.db and sets up three tables with the exact columns you need. The FOREIGN KEY parts mean “this number must match an id in another table” — like making sure every post has a real user who wrote it.

    Day 4: Build User Authentication (Login/Signup)

    Create Your Authentication System

    Now you need to let people create accounts and log in. Create src/routes/auth.js.

    Prompt to AI: “Write Express.js routes for user registration and login using SQLite, bcrypt for password hashing, and JWT for sessions. I need POST /register and POST /login endpoints. Include input validation and error handling.”

    The vibe coding AI will give you something like:

    const express = require('express');
    const bcrypt = require('bcrypt');
    const jwt = require('jsonwebtoken');
    const db = require('../database/db');
    
    const router = express.Router();
    const JWT_SECRET = 'your-secret-key-here'; // In real apps, use environment variables
    
    // Register new user
    router.post('/register', async (req, res) => {
      const { email, password } = req.body;
      
      // Check if email already exists
      db.get('SELECT email FROM users WHERE email = ?', [email], async (err, row) => {
        if (row) {
          return res.status(400).json({ error: 'Email already registered' });
        }
        
        // Hash password and save user
        const passwordHash = await bcrypt.hash(password, 10);
        db.run('INSERT INTO users (email, password_hash) VALUES (?, ?)', [email, passwordHash], function(err) {
          if (err) {
            return res.status(500).json({ error: 'Registration failed' });
          }
          
          // Create JWT token
          const token = jwt.sign({ userId: this.lastID }, JWT_SECRET);
          res.json({ token, userId: this.lastID });
        });
      });
    });
    
    // Login user
    router.post('/login', (req, res) => {
      const { email, password } = req.body;
      
      db.get('SELECT * FROM users WHERE email = ?', [email], async (err, user) => {
        if (!user) {
          return res.status(400).json({ error: 'Invalid email or password' });
        }
        
        const passwordMatch = await bcrypt.compare(password, user.password_hash);
        if (!passwordMatch) {
          return res.status(400).json({ error: 'Invalid email or password' });
        }
        
        const token = jwt.sign({ userId: user.id }, JWT_SECRET);
        res.json({ token, userId: user.id });
      });
    });
    
    module.exports = router;

    What this does:

    • Register: Takes email/password, scrambles the password with bcrypt (so even you can’t see their real password), saves to database, gives back a token
    • Login: Takes email/password, checks if they match what’s saved, gives back a token if correct
    • JWT Token: Like a temporary ID card that proves someone is logged in

    Create Login/Signup HTML

    Create src/public/index.html:

    Prompt to AI: “Write HTML for a simple login and registration form. Include email and password fields for both, with buttons to switch between login and register modes. Make it look clean with basic CSS styling.”

    This will give you a webpage with forms where people can type their email and password.

    Day 5: Build the Core Website Features

    Create Post Management

    Create src/routes/posts.js:

    Prompt to AI: “Write Express.js routes for website posts using SQLite. I need GET /posts to fetch all posts with user email and upvote count, POST /posts to create new posts (requires authentication), POST /posts/:id/upvote to upvote posts, and DELETE /posts/:id to delete posts. Include JWT authentication middleware.”

    Create the Main Feed

    Update your HTML to show posts:

    Prompt to AI: “Write JavaScript to fetch posts from /api/posts and display them in a list. Each post should show the text, author email, upvote count, upvote button, and timestamp. Include a form at the top to submit new posts. Handle authentication with JWT tokens stored in localStorage.”

    Important: Ask AI to explain what localStorage is: “localStorage is like your browser’s pocket — it remembers small pieces of information (like your login token) even after you close the webpage.”

    Add Comments

    Create src/routes/comments.js:

    Prompt to AI: “Write Express.js routes for comments. I need GET /posts/:id/comments to fetch comments for a specific post, and POST /posts/:id/comments to add new comments. Include user authentication and connect to SQLite database.”

    Day 6: Connect Everything and Test

    Create Your Main Server

    Create src/server.js:

    Prompt to AI: “Write an Express.js server that serves static files from public folder and uses the auth, posts, and comments route files. Include CORS and JSON middleware. Make it run on port 3000.”

    Test Your App

    Run your app:

    node src/server.js

    Open http://localhost:3000 in your browser. Test each feature:

    1. Register a new account
    2. Login
    3. Create a post
    4. Upvote a post
    5. Add a comment
    6. Delete your own post

    If something breaks: Copy the error message and ask AI: “I’m getting this error: [paste error]. What does this mean and how do I fix it?”

    Day 7: Deploy and Reflect

    Put It on the Internet

    Use a free service like Railway, Render, or Vercel:

    Prompt to vibe coding AI: “How do I deploy a Node.js Express app with SQLite to [pick a service]? Give me step-by-step instructions.”

    The Harsh Truth Of Vibe Coding

    By the end of the week, you’ll have:

    • A working website on the internet
    • Real experience with databases, authentication, and APIs
    • Code you can show in interviews
    • A foundation to build more complex apps

    You WON’T have:

    • Thousands of users
    • Perfect code
    • A business ready to scale
    • Advanced features

    And that’s exactly the point. You’ve learned the loop: plan → build → test → ship. That skill is worth more than any tutorial because you’ve felt what it’s like to go from zero to deployed app in one week.

    The real magic of vibe coding isn’t the website. It’s that you now know you can take any app idea and break it down into database tables, endpoints, and screens. You can use AI as a coding partner. You can ship things that work.

    That confidence will serve you for years.

    What’s Next?

    Week 2 ideas:

    • Add user profiles
    • Image uploads
    • Better styling with CSS frameworks
    • Email notifications
    • Search functionality
    • Admin features

    But first, show someone what you built. Share it. Get feedback. Feel proud that you went from idea to internet in seven days.

    Welcome to the vibe coder life.


    Quick Reference

    Common AI Prompts That Actually Work

    For debugging: “I’m getting this error: [paste error]. Here’s my code: [paste code]. What’s wrong and how do I fix it?”

    For new features: “Write [language] code that does [specific thing]. Include error handling and comments explaining what each part does.”

    For explanations: “Explain [concept] like I’m new to programming. Use simple words and give me a real example.”

    For code review: “Is this code correct? [paste code]. Are there any bugs or ways to improve it?”

    Essential Terminal Commands

    • node server.js – Start your app
    • npm install [package] – Add a new library
    • Ctrl+C – Stop your running app
    • git add . – Save all changes
    • git commit -m "message" – Create a save point
    • git push – Upload to GitHub

    Debugging Steps

    1. Read the error message completely
    2. Check the line number mentioned in the error
    3. Copy/paste the error to AI with your code
    4. Test the fix
    5. If still broken, ask AI for a different approach

    Remember: Every experienced programmer still googles basic things and copies code from Stack Overflow. Using AI is just the modern version of that. You’re not cheating — you’re learning efficiently.

    Ready to Build Something Bigger?

    You just proved you can ship a working app in a week. That’s the kind of momentum that builds real products and real businesses.

    If you’re thinking “okay, this was fun, but I want to build something people actually pay for” — that’s where Pixelswithin comes in. We help founders and builders like you turn weekend projects into products that matter. Whether you need help scaling your website, want to build something completely new, or just need someone who gets the vibe coding mindset, we speak your language.

    Ready to level up? Drop us a line at info@pixelswithin.com or check out our work at pixelswithin.com. Let’s build something that makes the internet a little more interesting.

    Keep vibing. Keep shipping. 🚀

  • How to Test an Idea for a Business — Find Winners Fast

    How to Test an Idea for a Business — Find Winners Fast

    If you get 10 business ideas a week but don’t trust any of them, here’s how to validate those startup ideas.

    Over the last year, I’ve used online tools like ChatGPT to validate (and reject) dozens of SaaS and microstartup ideas before writing a single line of code. This isn’t some hypothetical blog post — it’s the actual framework I use at Pixelswithin to evaluate whether an idea is desirable, doable, and worth my time as a solo founder.

    This is AI-backed product thinking, not just listicles and hype.


    🧠 Step 1: I Ask AI to Talk Me Out of the Idea — From Every Angle

    Before anything, I run my idea through two filters:

    1. CARVER matrix: Desirability vs Doability (scored 1–5 each)
    2. Executive personas: “What would the skeptical CTO say? The CFO? The CMO?”

    My CARVER matrix (yes, I actually score it):

    FactorQuestion I Ask MyselfScore 1–5
    DesirabilityWould someone want this today??
    DoabilityCan I build and support this solo??

    If it’s not at least a 6+ total, I toss it.

    Then I ask ChatGPT:

    “Act like a CTO. What are the technical risks, stack limitations, or dev headaches I’m overlooking?”
    “Act like a CMO. Why won’t this positioning land with users?”
    “Act like a CFO. Why is this a weak business model?”

    ⚠️ These role-based critiques surface problems fast — ones I’d never think of on my own.


    🧠 Step 2: I Ask for “Eclectic Sticky” Variants — Not Safe Ones

    I’ve learned not to ask AI for “good” ideas. I ask for eclectic sticky ones.

    My go-to prompt:

    “Give me 7 weird, emotionally-charged, sticky variants of this product. The kind people text their friends about even if they don’t use it.”

    Then I say:

    “Make them unexpected but still shippable by one person. No AI marketplace clones or dashboards for dentists.”

    I’m looking for things with:

    • ✨ Specific use cases
    • 🧠 Unique vibes or emotional angles
    • 📦 Feature sets that are tiny, but whole

    💡 Hyper-specific trick I use:

    I go to Reddit (like r/witchcraft, r/femalefounders, or r/adhdwomen) and copy real rants or unmet needs. I paste them into ChatGPT and ask:

    “Which of these sticky variants would make this person feel seen?”
    “Which idea would get this commenter to tag a friend?”

    If it doesn’t hit that nerve? It’s not sticky enough.


    🧠 Step 3: I Build Out the ICP in Public with AI — Not a Landing Page

    I don’t spin up a website. I go deep into customer archetypes.

    I use ChatGPT to:

    • Simulate voice and needs of 3–5 “dream users”
    • Write sample DMs they’d send asking about the tool
    • Give me a narrative of how they discovered the product and told their group chat
    • Map out day-in-the-life use cases with screenshots I haven’t even designed yet

    These fictional-but-accurate voices become my filters for:

    • Whether the idea is truly niche
    • Whether the solution feels empowering or patronizing
    • Whether I would want to talk to this customer every day for 3 years

    🧠 Step 4: I Test for a “Double Handshake” Pricing Model

    I don’t ask GPT for pricing tiers. I ask it to help me find pricing signals.

    Specifically, I use this idea:

    A “double handshake” means the pricing feels obvious to both me and the buyer — without negotiation.

    I test for:

    • Whether the value is immediate and self-justifying
    • Whether the price aligns with the way my target user already spends
    • What emotional outcome they’re buying access to, not just features

    Example:

    For Cute Tarot, AI helped me realize people weren’t paying for readings — they were paying for a daily moment of reflection that felt real. That reframed my pricing to be about frequency, not accuracy.


    🧠 Step 5: I Drop the Idea into Reddit and See Who Reacts

    No surveys. No cold emails. No forms.

    I just complain on Reddit.

    Seriously. I go into a relevant subreddit (e.g. r/Startups, r/witchcraft, r/solopreneurs) and say:

    “Anyone else annoyed by how hard it is to do X?”
    “Has anyone tried to solve [problem]? What tools have you found?”

    I don’t pitch. I observe.

    • If people commiserate, I know there’s shared frustration.
    • If people drop links, I study the competitors they link to.
    • If the thread dies, I move on.

    Then I bring those insights back into GPT and say:

    “How would this product need to be positioned to feel radically better than the tools mentioned here?”


    ✅ Summary: The Pixelswithin AI Validation Framework

    StepWhat I Actually DoAI’s Role
    1. CARVER + Exec ViewScore ideas + challenge each seatRaise blind spots
    2. Eclectic VariantsPrompt for sticky + emotional anglesReveal true resonance
    3. Fictional ICPsSimulate the “fan” userBuild from the user inward
    4. Double HandshakePricing alignment checkAlign value and spend habits
    5. Reddit RadarComplain in publicDetect if others light up or shrug

    Why This Works

    This framework is fast, intuitive, and emotionally honest. You can validate your startup idea with AI — you don’t need paid traffic, fake surveys, or 30-page business plans. It helps me:

    • Kill 8 bad ideas before I waste a weekend
    • Turn 1 into a concept I’m proud to build
    • Skip generic “what if” thinking and go straight to: does this resonate or not?

    If you want to borrow my prompts, steal my worksheets, or have me walk through your idea with you — that’s literally what I built Pixelswithin for.

    Product thinking isn’t just about UX.
    It’s about protecting your life energy as a solo founder.

  • One-Person SaaS — Build & Launch Your Solo Software Business

    One-Person SaaS — Build & Launch Your Solo Software Business

    🧠 What Is a One Person SaaS Company? (And Why So Many People Want One Right Now)

    Imagine, a one person SaaS company: no investors, no cofounders, no meetings, and no waiting for permission. Just you, your idea, and a quietly profitable little software business that pays your bills.

    That’s the vision behind the one-person SaaS — and it’s not a fantasy. More people than ever are building SaaS companies solo, sometimes earning thousands per month with tools that barely existed five years ago.

    And the best ones don’t just ship quickly — they’re rooted in product thinking from day one: solving the right problem, for the right people, in the simplest way.

    Whether you’re a developer tired of bloated teams, a creator exploring new revenue streams, or someone with a simple idea you can’t shake, this might be the lean business model you’ve been waiting for.


    What Is a One-Person SaaS?

    A one-person SaaS (Software as a Service) is exactly what it sounds like: a software product run entirely by one person.

    That means you’re the:
    🧠 Founder
    🧑‍💻 Developer
    🎨 Designer
    📣 Marketer
    💌 Customer support

    Some solo SaaS founders automate their support and onboardings so well, they only “work” a few hours per week. Others use their apps as stepping stones to larger companies or lifestyle freedom. The point is: it’s small by design. And that’s the superpower.


    Why One-Person SaaS Companies Work

    There’s a reason this model is exploding in 2025. A few, actually:

    ✅ 1. Low Overhead

    You don’t need office space, employees, or even a big tech stack. Most apps run on $20–100/month in tools.

    ✅ 2. High Autonomy

    You control the roadmap, pricing, pace, and vision. No client meetings. No misalignment. Just flow.

    ✅ 3. Modern Tooling

    Stacks like Supabase, SvelteKit, Vercel, Stripe, and Notion make it absurdly fast to launch. You can ship your MVP in a weekend.

    ✅ 4. Niche, Not Scale

    You don’t need to “disrupt” anything. You just need to solve one specific problem for one specific group of people. You can win with 100 paying users.

    This is where product thinking really shines: when you zoom in, get specific, and build exactly what one slice of users actually need — no bloat, no overbuilding.


    Examples of Successful One-Person SaaS Companies

    Here’s what this looks like in the wild:

    FounderProductMonthly Revenue
    Pieter LevelsNomad List, Remote OK$100k+ total
    Danny PostmaProfilePicture.AI, HeadlimeExited to Jasper.ai
    Jon YongfookBannerbear$30k+/mo
    Arvid KahlFeedbackPanda (sold)5 figures/mo
    You?Maybe you’re next… 👀

    And it’s not just tech bros or AI builders — there are solo apps for:

    • Therapists scheduling clients
    • Tarot readers offering paid readings
    • Creators building custom dashboards
    • Spiritual coaches selling moon planners
    • Laundry delivery services (!)

    The Types of Problems One-Person SaaS Can Solve

    Most successful solo apps solve very boring problems for very specific people. That’s the point.

    Here are some idea categories:

    • Organization: journaling, tracking, inventory, bookings
    • Automation: workflows, alerts, reminders, filters
    • Presentation: landing pages, portfolios, galleries
    • Payments: subscriptions, donations, tips, scheduling

    If it’s tedious and repetitive for someone, it’s probably SaaS-able.

    Get some ideas at our App Idea Generator — optimized for solo founders and micro SaaS.


    What Reddit and IndieHackers Are Saying

    Solo SaaS has a passionate cult following online — and for good reason. On r/IndieHackers, you’ll see people sharing revenue screenshots like:

    “$7,300 MRR — quit my job last year, just hit 1,000 users.”
    “I built a niche tool for Amazon sellers and now it pays my mortgage.”
    “My app didn’t go viral. It just… worked.”

    These aren’t pipe dreams. They’re small, sustainable wins built by normal people.


    Can You Build a One-Person SaaS If You’re Not a Developer?

    Absolutely.

    The no-code and low-code space has exploded, making it easier than ever to build MVPs without touching a code editor.

    Here’s what people are using:

    No-code: Bubble, Glide, Softr, Notion + Tally + Zapier

    Low-code: Supabase + Svelte, Firebase + Vue, Next.js + Prisma

    Infra: Vercel, Render, Cloudflare Pages

    Payments: Stripe, Lemon Squeezy, Gumroad

    Even tools like ChatGPT can help you scaffold your backend or generate boilerplate logic.


    Should You Try It?

    A one-person SaaS might be right for you if:

    ✅ You enjoy learning and wearing multiple hats
    ✅ You value freedom over funding
    ✅ You’re not trying to “change the world” — just improve one corner of it
    ✅ You’ve got an itch to build
    ✅ You’re tired of waiting for the “right time”


    🔨 How to Build Your Own One-Person SaaS (Even If You’re Starting From Scratch)

    So you want to build a one-person SaaS. No cofounders. No investors. Just a solid little product that solves a real problem — and maybe even earns you recurring revenue in your sleep.

    But how do you actually get from idea to launch without getting lost in the weeds?

    This guide walks you through the leanest possible path to shipping your own solo SaaS — including tools, timelines, and tips from real solo founders.


    📍The Roadmap: From Idea → MVP → Launch

    You don’t need a 40-page business plan. You just need a few clear steps:


    ✅ 1. Pick a Small, Painful Problem

    Great solo SaaS apps solve boring, frustrating, narrow problems.

    Ask yourself:

    • What do people do in spreadsheets that drives them crazy?
    • What’s something you or your friends manually track or repeat?
    • What’s a business process that’s unsexy, but necessary?

    Examples:

    • A booking tool for tarot readers
    • A product inventory manager for craft sellers
    • A goal tracker that syncs with your calendar

    👉 Don’t think “startup idea.” Think “mini tool someone would gladly pay $10/month for.”


    ✅ 2. Sketch the Flow (Before Touching Code)

    Pixelswithin helps founders shape these raw ideas into products with strong UX and clear business logic — a hallmark of solid product thinking.

    Your goal: understand what the user sees, clicks, and expects.

    Try this quick mockup checklist:

    • What does the homepage say?
    • What’s the main call to action?
    • What happens after sign-up?
    • What’s the core loop (the repeatable action)?

    Tools to use:

    You’re not designing it to look pretty — just to clarify the user’s journey.


    ✅ 3. Pick Your Stack (Low-Code or Code-Based)

    Depending on your comfort level, you have two strong paths:


    🧰 Option A: Low-Code Stack (Fastest to Launch)

    👉 Best for: designers, creators, or marketers who don’t code but want control.


    🧰 Option B: Code-Based Stack (More Flexible, Still Lightweight)

    👉 Best for: developers or those who want to grow into more complexity later.


    ✅ 4. Build an MVP That Actually Solves the Problem

    This means:

    • No dashboards full of fluff
    • No profile pictures or settings screens at launch
    • Just the core workflow: sign up → do the thing → get value

    🎯 Example: If your app helps coaches generate intake forms, the MVP should let them:

    1. Create a form
    2. Share the link
    3. Collect responses

    That’s it.


    ✅ 5. Set Up Payments Early (Even a Waitlist Page Works)

    Don’t wait until your app is “perfect” to show it to people.

    Instead:

    • Make a one-pager with screenshots and a waitlist
    • Add a fake checkout button (with Stripe test mode)
    • Show pricing tiers, even if it’s $5–15/month
    • Bonus: offer a limited-time “founder deal” to seed interest

    ✅ 6. Launch Small — But Launch Publicly

    Your first users might be from:

    👀 People love seeing tiny, focused products solving real problems.
    🧡 Ask for feedback. Show your roadmap. Ship often.


    🧰 Mini Toolkit: What You’ll Likely Need

    AreaTool Options
    MockupsFigma, Excalidraw, Whimsical
    FrontendSvelteKit, Next.js, Bubble, Softr
    BackendSupabase, Firebase, Airtable
    HostingVercel, Cloudflare Pages, Render
    PaymentsStripe, Lemon Squeezy, Gumroad
    EmailConvertKit, Buttondown, Resend
    AuthSupabase Auth, Clerk, Memberstack
    AnalyticsUmami, Plausible, PostHog
    Domain NamePorkbun, Namecheap

    🧠 Tips from Real Solo SaaS Builders

    • “Charge early. You’ll learn faster.”
    • “Ship ugly. Fix it later.”
    • “Talk to people using your tool.”
    • “Solve one thing. Nail it. Then expand.”

    ✅ You’re Ready If…

    • You want creative freedom
    • You don’t need VC money
    • You enjoy learning while building
    • You believe in long-term upside over short-term growth hacks

    And if you ever feel stuck, a quick dose of product thinking can help. At Pixelswithin, we help solo founders clarify their product’s job-to-be-done so they can move faster with confidence.


    💌 How to Market, Maintain, and Grow Your Solo SaaS Without Burning Out

    So you’ve launched — or you’re about to. The MVP is live. The stack is humming. You’ve even had a few early users trickle in.

    Now what?

    This is where many solo SaaS founders stall: not because the product is bad, but because the energy runs out. Marketing feels gross. Maintenance feels endless. Growth feels like a full-time job you didn’t sign up for.

    But it doesn’t have to be that way.

    Let’s walk through sustainable strategies to market, maintain, and grow your SaaS product as a team of one — without losing your mind.


    📣 Sustainable Marketing for One-Person SaaS Founders

    You don’t need to go viral. You just need to be findable, useful, and consistent.

    🧲 1. Pick a Primary Channel

    Choose one channel that plays to your strengths:

    • 🐦 Twitter/X if you like writing short, clever insights
    • 📹 YouTube if you’re a visual teacher
    • 💌 Newsletter if you like depth and storytelling
    • 💬 Reddit if you enjoy direct problem-solving
    • 📱 TikTok if you’re charismatic + spontaneous

    👉 Don’t try to do everything. Just pick one and show up weekly.


    📝 2. Create Evergreen Content

    • Product Use Cases: “How to Use [Your App] to [Get Outcome]”
    • Tutorials: “How I Built My SaaS with [Stack Name]”
    • Comparisons: “Why I Chose [Your Tool] Over [Popular Tool]”
    • Behind-the-Scenes: “Week 1 to 1,000 Users — What Worked”

    💡 This content educates + builds trust. Use SEO to your advantage. You can even use programmatic SEO to scale this process.


    🧪 3. Market While Building

    • Share your roadmap
    • Ask for feedback on features
    • Turn bug fixes into content
    • Show pricing tests and lessons

    This is called building in public — and it works. People love following a founder with transparency and humility.


    🔧 Maintaining Without Losing Steam

    Maintenance kills momentum when:

    • You never know what to work on next
    • You spend more time fixing than improving
    • You’re afraid to ship changes because users are already live

    Let’s fix that.


    🧭 1. Use a “Tidy Up” Cycle

    Split your time between:

    • Fixes (bugs, complaints)
    • Flow (UX improvements)
    • Features (new stuff)

    🗓 Tip: Do weekly “Tidy Tuesdays” where you clean up minor bugs and UI papercuts. This builds confidence without burning you out.


    🗣️ 2. Talk to Users… Your Way

    You don’t need a support team — just a system.

    Use:

    🎯 Respond clearly, set boundaries, and look for patterns. A question asked twice = a doc you should write.


    🧘 3. Protect Your Energy

    The real killer of solo SaaS? Burnout from context switching.

    Try this:

    • Batch marketing tasks (write 3 posts at once)
    • Automate outreach with tools like Buttondown, Tweet Hunter, or Zapier
    • Take weekends completely offline — your app won’t die

    Remember: the goal is freedom, not just “success.”


    📈 Growing Without Getting Loud or Selling Out

    Growth doesn’t have to mean hustle.

    📊 1. Add Small Experiments (Not Big Bets)

    Ideas that compound:

    • A “Refer a Friend” program
    • A “Pay What You Want” pricing test
    • A monthly email digest with usage insights
    • A tiny affiliate program
    • A free tool or widget that links to your main app

    🎯 These grow awareness passively — without relying on ads or huge launches.


    🧩 2. Add Just-In-Time Upsells

    Your best growth lever is showing the right upgrade prompt at the right time.

    Examples:

    • “You’ve created 3 projects — unlock unlimited for $5/mo”
    • “Exporting PDFs is part of our Pro plan”
    • “You’ve hit 80% of your storage limit — want to upgrade?”

    This is quiet, kind monetization that respects your users’ pace.


    💌 3. Stay Connected to Why You Built This

    When in doubt, remember:

    • You’re not building for the masses — just your kind of person
    • You don’t need 10,000 users — you need 100 paying ones
    • You don’t need to impress anyone — just help someone

    🧰 Summary Checklist: After Launch, Focus On…

    ✅ One clear marketing channel
    ✅ One tidy up day/week
    ✅ Regular user feedback loops
    ✅ Tiny experiments
    ✅ Calm pace and honest pricing
    ✅ Staying in your zone of genius


    💡 What’s Next?

    If you’ve got an idea — even a half-formed one — you’re closer than you think.

    Need help choosing your stack, roadmap, or pricing?
    👉 Reach out to Pixelswithin for a 1-on-1 clarity session or code review.

  • How I Fixed My App’s UX and Turned Visitors Into Customers

    How I Fixed My App’s UX and Turned Visitors Into Customers

    What You Can Learn From My Mistakes

    For a long time, I thought the way to succeed with side projects was to just keep building. My process looked something like this:

    1. Get excited about an idea
    2. Design the whole thing in Photoshop (at the time)
    3. Build the MVP
    4. Launch quietly
    5. Tweak the landing page
    6. Wonder why no one’s signing up
    7. Add more features
    8. Repeat step 7

    It felt productive. I was always working on something. But nothing ever really got traction — and definitely didn’t make money. It drove me crazy.

    The Turning Point: When I Stopped Adding Features

    What finally changed my mindset was reading The Goal by Eliyahu Goldratt. It’s a book about bottlenecks in manufacturing, but it applies perfectly to building products:

    If you improve anything that isn’t the constraint, you’re just adding complexity.

    Once I started thinking in terms of constraints, everything shifted.

    What I Changed (and What Finally Worked)

    Instead of asking, “What should I build next?”

    I started asking: “What’s actually stopping someone from paying me?” That’s “the” goal.

    In most cases, it wasn’t a missing feature. It was something embedded in the process of something that already existed, like:

    • The landing page headline was vague—so users never clicked the download button
    • The signup form asked for too much info—so users never got to experience the product
    • The onboarding showed users how to use the app, but not why—so users never got value

    After a while, I figured out that every step of the “funnel” is important, but especially the step right before people fall off. That’s your bottleneck.

    Why A Great Build Wasn’t Enough

    I develop apps as a freelancer now. One client I worked with had a really solid product — great retention, real customer results — but almost no one was converting. The problem wasn’t the tool. It was the storytelling.

    We added a simple “How It Works” page: a clean, visual 3-step walkthrough that explained exactly what the product did and why it mattered. That alone gave them a meaningful boost in conversions and helped unlock their path to 7-figure ARR.

    Not because we added more! Just because we focused on the real constraint.

    TL;DR You’ve built enough, now find the point where people get disinterested and fix that.

  • Redefining the future of work at Pixelswithin

    Redefining the future of work at Pixelswithin

    Art by Karolis Strautniekas

    We make web software according to our homepage, for experts who love their work. This latest blog post answers what exactly we mean by that. Read on to learn who we work with and why we’re motivated to provide you solutions.

    The future of work is human, not corporate.

    At Pixelswithin we believe that work is anything you believe helps create the future you want to see.

    Yes, the future is individualized.

    Every day there are new stories to help support this.

    From influencers with tens of millions of followers that you’ve never heard of to individual engineers at NVIDIA retiring with such high net worth that the company’s stock is suffering, people everywhere are creating their own little worlds.

    With all this power in our hands, we must take responsibility for not just our future world, but the future world of those around us, those we love, and those who rely on us.

    Living by our values is the best way to make sure what we find worthy continues.

    The
    Future
    is
    Yours

    The future of work is for life, not for pay.

    We believe the old notion of “going to work” is outdated.

    As everything picks up faster and faster, people who shun the work to create their future will simply have their future determined by someone else.

    Just like we never “log off” anymore (not since the 90s) we now never “clock out.”

    Come back! I didn’t mean to lose you. Don’t worry, we get it.

    Work sucks, I know — Blink 182.

    Work in the past sucked. Yet we begged for work.

    Jobs wanted signs from The Great Depression.

    It was a natural tension that even Homer Simpson was spiritually keyed into.

    But work in the past was not work exactly. It was we needed to do to finally get down to work.

    Whether we’re talking about agriculture or industry, the greatest revolutions of our times were only getting the foundation laid for what’s coming up ahead.

    Anything that prevents you from doing your work is your work.

    Our ancestors

    Work, jobs, pay, worth, money, living, surviving. It’s all got wrapped into one idea. That’s the problem. At Pixelswithin, we believe that to do our best work, we must separate work from money.


    Work is what you do.
    Sometimes it’s for pay.

    Creating stuff is work.
    Talking to people is work.
    Cleaning your room is work.
    Sharing ideas is work.
    Complaining is work.
    Helping a stranger is work.
    Being nice to animals is work.

    Washing the dishes is work.
    Telling mean jokes is work.
    Paying for Chipotle is work.

    Leaving a grocery cart outside is work.

    Is this the work you want to do?


    The future of work is spiritual, not just busy.

    Our tools require human interaction, and guess what? Everything else does too.

    Pretty much since the dawn of philosophy we have been asking the question: Why do we need consciousness? What purpose does it serve? Well, the purpose is easy to extrapolate once we concede the simulation hypothesis. Consciousness is an integrated (combining five senses) subjective interface between the self and the rest of the universe. The only reasonable explanation for its existence is that it is there to be an “experience.”

    Confirmed! We Live in a Simulation — Scientific America

    The future of work is whatever you want it to be.

    At Pixelswithin, we connect people with tech. If you’d like to work with us, reach out.

  • What are bespoke web solutions?

    What are bespoke web solutions?

    Introduction to Bespoke Web Solutions

    Bespoke web solutions mean websites and web apps that are specially made to fit the exact needs and goals of a business or person. These aren’t like pre-made products that are meant to suit everyone. Bespoke solutions are built from scratch, keeping in mind what the client specifically wants. This means every feature and function matches exactly what the user needs, giving them more flexibility, ability to change, and personal touch. While pre-made products may be faster and cheaper to use, bespoke solutions have more long-term benefits because they can grow with your business, work better with your existing systems, and offer a user experience that’s more in tune with your unique business needs.

    Key Features of Bespoke Web Solutions

    Personalized Design

    Bespoke web solutions offer a unique look and feel that represent your brand. Unlike generic templates, these designs are created to match your specific preferences and requirements, ensuring your website stands out.

    Flexibility

    With a personalized web solution, you get the flexibility to modify layouts, navigation, and features as your business needs change. This adaptability helps in keeping the website relevant and user-friendly.

    Scalability

    Scalable web applications can grow alongside your business. A bespoke web solution can handle increased traffic, data, and functionalities as your business expands over time. This means you won’t have to rebuild your site every time you experience growth.

    User Experience Optimization

    User experience is a crucial aspect of web design. Bespoke web solutions allow for the optimization of every interaction a user has with the site. By focusing on ease of navigation, fast load times, and intuitive interfaces, you ensure a positive experience for each visitor.

    Benefits of Bespoke Web Solutions for Businesses

    Using bespoke web solutions provides many advantages for businesses. These advantages can help companies stand out and operate more efficiently. Here are some main benefits:

    Enhanced Branding: A bespoke web solution allows businesses to express their unique brand identity. Instead of using a bespoke template that hundreds of other businesses might use, they get a site that reflects their brand’s personality, values, and goals. This helps to create a strong and memorable impression on visitors.

    Improved Functionality: Bespoke web solutions are built with the specific needs of the business in mind. This means they can include features and integrations that aren’t available in off-the-shelf solutions. Whether it’s a bespoke form, a unique e-commerce workflow, or a specific integration with other software, bespoke solutions ensure that the website works exactly as needed.

    Better Performance: Performance is crucial for any website. Bespoke web solutions are optimized to handle the specific demands of the business. This leads to faster loading times, more efficient data processing, and a better overall user experience. Better performance can also improve search engine rankings, making it easier for potential customers to find the site.

    Higher Customer Satisfaction: When a website is easy to use and meets the needs of its users, customer satisfaction naturally increases. bespoke web solutions can be designed to provide the best possible user experience, addressing common pain points and making it easier for customers to accomplish their goals. This can lead to higher engagement, more conversions, and improved customer loyalty.

    In conclusion, bespoke web solutions offer a range of benefits that can help businesses enhance their online presence and operate more effectively. From branding to functionality and performance to customer satisfaction, bespoke solutions provide the tools businesses need to succeed.

    Common Scenarios Where Bespoke Web Solutions Are Ideal

    Bespoke web solutions offer unique advantages in many business situations. Here, we will explore specific scenarios in industries such as e-commerce, service-based businesses, non-profits, and tech startups where these bespoke solutions prove to be particularly beneficial.

    E-commerce

    For e-commerce businesses, bespoke web solutions can significantly improve user experience and operational efficiency. Unlike generic platforms, bespoke websites can be crafted to accommodate specific business processes, unique product attributes, and personalized customer journeys. This means better integration with inventory management, smoother checkout processes, and customized analytics to track user behavior, ultimately driving more sales and reducing cart abandonment rates.

    Service-Based Businesses

    Service-based businesses, including consulting firms, legal practices, and healthcare providers, benefit from bespoke web solutions by having functionalities that directly address their unique needs. For instance, bespoke appointment booking systems, client management portals, and secure communication channels can be integrated seamlessly. This ensures that all client interactions are handled effectively, reducing administrative burdens and enhancing the overall client experience.

    Non-profits

    Non-profit organizations often rely on their websites to spread awareness, engage with communities, and collect donations. A bespoke web solution allows these organizations to create engaging stories, simplify donation processes, and manage volunteer sign-ups more effectively. Features such as personalized donor portals, event management systems, and integration with social media platforms can help in building stronger relationships with supporters and reaching larger audiences.

    Tech Startups

    Tech startups require flexibility and scalability in their web solutions. A custom-built website can adapt to the evolving needs of a startup, whether it’s integrating new technologies, expanding functionalities, or scaling operations. By having a platform built to their specific requirements, startups can focus on innovation and growth without being constrained by the limitations of off-the-shelf solutions. This includes bespoke dashboards for real-time data analysis, integration with APIs, and robust security measures to protect sensitive information.

    Steps to Develop Bespoke Web Solutions

    1. Initial Consultation

    The first step is to have an initial meeting with the client. This is a chance to understand the client’s business, goals, and challenges. During this consultation, general ideas and expectations are discussed to form a foundation for the project.

    2. Requirement Analysis

    After the initial consultation, a more in-depth analysis is conducted. This involves identifying the specific features and functionalities the client needs. Detailed discussions help in gathering all necessary information to create a clear set of requirements.

    3. Design

    With the requirements in hand, the design phase begins. This includes creating wireframes and mockups to visualize the layout and flow of the web solution. Feedback from the client is essential at this stage to ensure the design aligns with their vision.

    4. Development

    Once the design is approved, the development phase starts. This involves coding and building the actual website or web application. Developers work on creating the structure, implementing features, and integrating necessary systems. Regular updates and reviews ensure that everything is on track.

    5. Testing

    Testing is a critical step to ensure the web solution works as expected. Different types of testing, such as unit testing, integration testing, and user acceptance testing, are performed to identify and fix any issues. Testing helps to provide a seamless experience for end-users.

    6. Deployment

    Once testing is complete and the client is satisfied, the web solution is deployed. This means making it live for users. Final checks are done to ensure everything runs smoothly, and any necessary post-launch support is provided.

    By following these steps, a web solution is developed that meets the specific needs of the client. Each step builds on the previous one, ensuring a thorough and thoughtful approach to creating a high-performing web solution.

    Choosing the Right Partner for Bespoke Web Solutions

    When looking for a web development partner, it’s important to consider several key factors. Here are some guidelines to help you make the best choice:

    1. Experience: Ensure the partner has a solid track record in web development. Experience often translates to better problem-solving skills and familiarity with various technologies. Look into how long they’ve been in business and the complexity of the projects they’ve handled.
    2. Industry Expertise: Different industries have unique needs. Make sure the web development partner has experience in your specific field. This can be crucial for understanding your business requirements and anticipating challenges that might come up.
    3. Portfolio: Review their past projects. A strong portfolio reflects the quality and range of their work. It will help you see if their style and capabilities align with your expectations. Pay close attention to the design, functionality, and user experience of the websites in their portfolio.
    4. Customer Testimonials: Feedback from previous clients can provide valuable insights into the partnership. Look for testimonials on their website or ask for references. Satisfaction ratings and comments often reveal how reliable, communicative, and responsive the partner is.

    Pixelswithin, a Los Angeles-based web development studio, exemplifies these qualities. They specialize in personalized website and web application development, adhering to a modular approach that can evolve with the business’ needs. Catering to various sectors, including business owners, tech startups, non-profits, freelancers, marketing teams, and e-commerce businesses, Pixelswithin provides comprehensive business technology solutions. Since 2002, their data-informed iterative development process has ensured continuous improvement and adaptability, helping businesses focus on their core activities while managing their digital presence.

    Choosing wisely will set the foundation for a successful digital presence. Take your time to evaluate these criteria before making your final decision.

    Investing in a bespoke web solution can provide your business with the tools it needs to thrive in an ever-changing digital landscape. Whether you are looking to enhance your brand, improve functionality, or boost performance, a bespoke web solution can address your unique needs and challenges. If you’re ready to elevate your online presence, consider Pixelswithin for your next web development project. Visit their website to learn more about their services and get started on creating a web solution that’s perfect for you.

  • Website user experience best practices for high engagement

    Website user experience best practices for high engagement

    Your website is often the first point of contact between your business and potential customers. A seamless user experience (UX) is critical in capturing interest and encouraging deeper engagement. Poor UX can lead to frustration, high bounce rates, and lost opportunities. So, how can you drastically improve your website user experience to foster better engagement? Check out these website user experience best practices.

    Simplify Navigation for a Seamless Experience

    Easy navigation keeps visitors engaged and reduces bounce rates. Simplifying your website’s navigation is crucial. Use clear, concise labels and organize your content logically. Implement a search bar to help users find what they need quickly. Consider tools like Crazy Egg to analyze user behavior and identify navigation issues.

    Optimize Load Times to Retain Visitors

    Fast load times enhance user satisfaction and boost engagement. A slow website can deter visitors and harm your SEO rankings. Optimize images, leverage browser caching, and minimize HTTP requests to speed up your site. Tools like Pingdom can help you monitor and improve your website’s load times.

    Ensure Mobile Responsiveness for Wider Reach

    A mobile-friendly site captures a larger audience and increases engagement. With the increasing use of mobile devices, ensuring your website is responsive is non-negotiable. Use responsive design techniques to adapt your site to various screen sizes. Test your website’s mobile compatibility with Google’s Mobile-Friendly Test.

    Incorporate User Feedback for Continuous Improvement

    Regular feedback leads to ongoing enhancements and better user satisfaction. Gathering and implementing user feedback is essential for continuous improvement. Use surveys, feedback forms, and user testing sessions. Tools like Hotjar can provide insights through heatmaps and session recordings.

    Utilize Engaging Visuals and Clear CTAs

    Attractive visuals and clear calls-to-action keep users interested and drive interactions. High-quality images, videos, and graphics can make your website more appealing. Use clear and compelling calls-to-action (CTAs) to guide users toward desired actions. Platforms like Canva can help you create professional visuals without needing advanced design skills.

    Improving your website’s user experience is vital for increasing engagement and fostering long-term relationships with your visitors. By simplifying navigation, optimizing load times, ensuring mobile responsiveness, incorporating user feedback, and using engaging visuals, you can create a website that not only attracts but also retains and delights your audience. For expert assistance in web development and UX design, reach out to Pixelswithin today and let us help you build a website that truly engages.

    Boost your website engagement with tailored tech from an agency that knows website user experience best practices. Contact Pixelswithin today and see how we can transform your web presence.

  • End to end web development collaboration: Key factors for success

    End to end web development collaboration: Key factors for success

    In end to end web development, working together effectively is crucial for project success. One major issue teams face is miscommunication, which can lead to delays and poor results. Here’s how to address common collaboration challenges using popular tools.

    Miscommunication and Information Silos in Full-stack Web Development

    Miscommunication can create information silos where critical details aren’t shared among team members. This leads to misunderstandings and duplicated efforts.

    Use clear and consistent communication channels. Tools like Slack provide a centralized platform for real-time messaging, file sharing, and collaboration. By creating channels for different teams or projects, everyone stays informed and connected.

    Lack of Organization and Task Tracking in Comprehensive Web Development Projects

    Without a structured system to organize tasks and track progress, managing workloads can become chaotic, resulting in missed deadlines.

    Implement project management tools like Trello or Asana. These tools help you create boards, lists, and cards to manage tasks, set deadlines, and assign responsibilities. This way, team members can easily see what needs to be done and track progress.

    Complete Website Solutions Code Conflicts and Inefficient Code Management

    When multiple team members work on the same codebase, conflicts and integration issues can arise if changes aren’t properly managed.

    Use version control systems like Git and platforms like GitHub or GitLab. These tools help teams manage code changes efficiently, track revisions, and collaborate on code without conflicts. Features like branching and merging ensure smooth integration.

    Lack of Coordination and Progress Visibility

    If team members aren’t regularly updated on each other’s progress, coordination can suffer, and priorities may become misaligned.

    Conduct regular stand-up meetings, daily or weekly, to provide updates on progress, discuss challenges, and plan next steps. Tools like Zoom or Microsoft Teams facilitate virtual meetings, especially for remote teams. These meetings help keep everyone informed and aligned.

    Isolation and Lack of Team Cohesion

    Team members may feel isolated or disconnected from the overall project, reducing their motivation and engagement.

    Foster a collaborative culture by promoting teamwork and open communication. Platforms like Confluence allow team members to document and share knowledge, collaborate on content, and provide feedback. Celebrating successes and recognizing contributions also helps build a strong, cohesive team.

    By addressing these common challenges and using the right tools, you can improve collaboration and ensure your team works together efficiently on end to end web development projects.

    Ensure successful end to end web development

    To enhance your team’s collaboration and ensure successful web development, contact Pixelswithin today. We’re based in Los Angeles and have been launching great websites since 2002. Let’s build something great together!

  • Improving website performance

    Improving website performance

    Is your website lagging, leading to frustrated users and missed opportunities? Improving website performance is crucial for retaining visitors and driving conversions. A slow or unresponsive site can damage your reputation and bottom line. In this post, we’ll explore five effective strategies to boost your website’s speed and overall performance, ensuring a seamless user experience.

    Optimize Images for Faster Load Times

    Slow-loading images cause users to abandon your site. High-quality images can significantly slow down your website. Tools like TinyPNG help compress images without losing quality, reducing load times and enhancing user experience.

    Utilize a Content Delivery Network (CDN)

    Geographical distance can cause delayed content delivery. A CDN stores copies of your site across various global servers, ensuring faster content delivery to users. Services like Cloudflare offer easy CDN integration, improving speed and reliability.

    Implement Caching Solutions

    Frequent data retrievals can slow down page loading. Caching reduces the load on your server by storing copies of your web pages. Plugins like W3 Total Cache can improve site performance by enabling browser and server-side caching.

    Minimize HTTP Requests

    Too many HTTP requests can overwhelm the server. Each element on a webpage requires an HTTP request. By minimizing these requests, you can significantly speed up your site. Tools like Pingdom help identify and reduce unnecessary requests.

    Regularly Audit and Clean Your Website

    Unnoticed performance bottlenecks can degrade site speed. Routine audits can help identify performance bottlenecks. Services like Google PageSpeed Insights provide actionable recommendations to enhance your site’s speed and performance.

    Improving website performance is an ongoing process that requires attention to detail and regular maintenance. By implementing these strategies, you can ensure a fast, efficient, and user-friendly website. For tailored solutions and expert assistance, reach out to Pixelswithin to discuss how we can help optimize your website performance.

    Ready to transform your website’s performance? Contact Pixelswithin today to learn more about our custom web development solutions and how we can help your business thrive online.